2026年10月22日星期四

Modular Chandelier Assembly: Site-Proof Part Numbering

A modular chandelier rarely fails on site because the fixture is wrong. It fails because the crate, the drawing and the ceiling stop agreeing with each other. Forty arms arrive in three boxes, the base plate sits in a fourth, and the only person who knew which arm faced the window has moved on. Installation becomes trial fitting, and trial fitting scratches a finish that took weeks to match.

This guide is for the people who specify, buy or receive modular decorative fixtures for hotels: designers writing the specification, buyers chasing delivery, site managers who inherit the boxes. It covers what a module identifier must carry, why direction marks differ from position marks, how crate mapping ties boxes to build order, and the checks worth doing before the first lift.

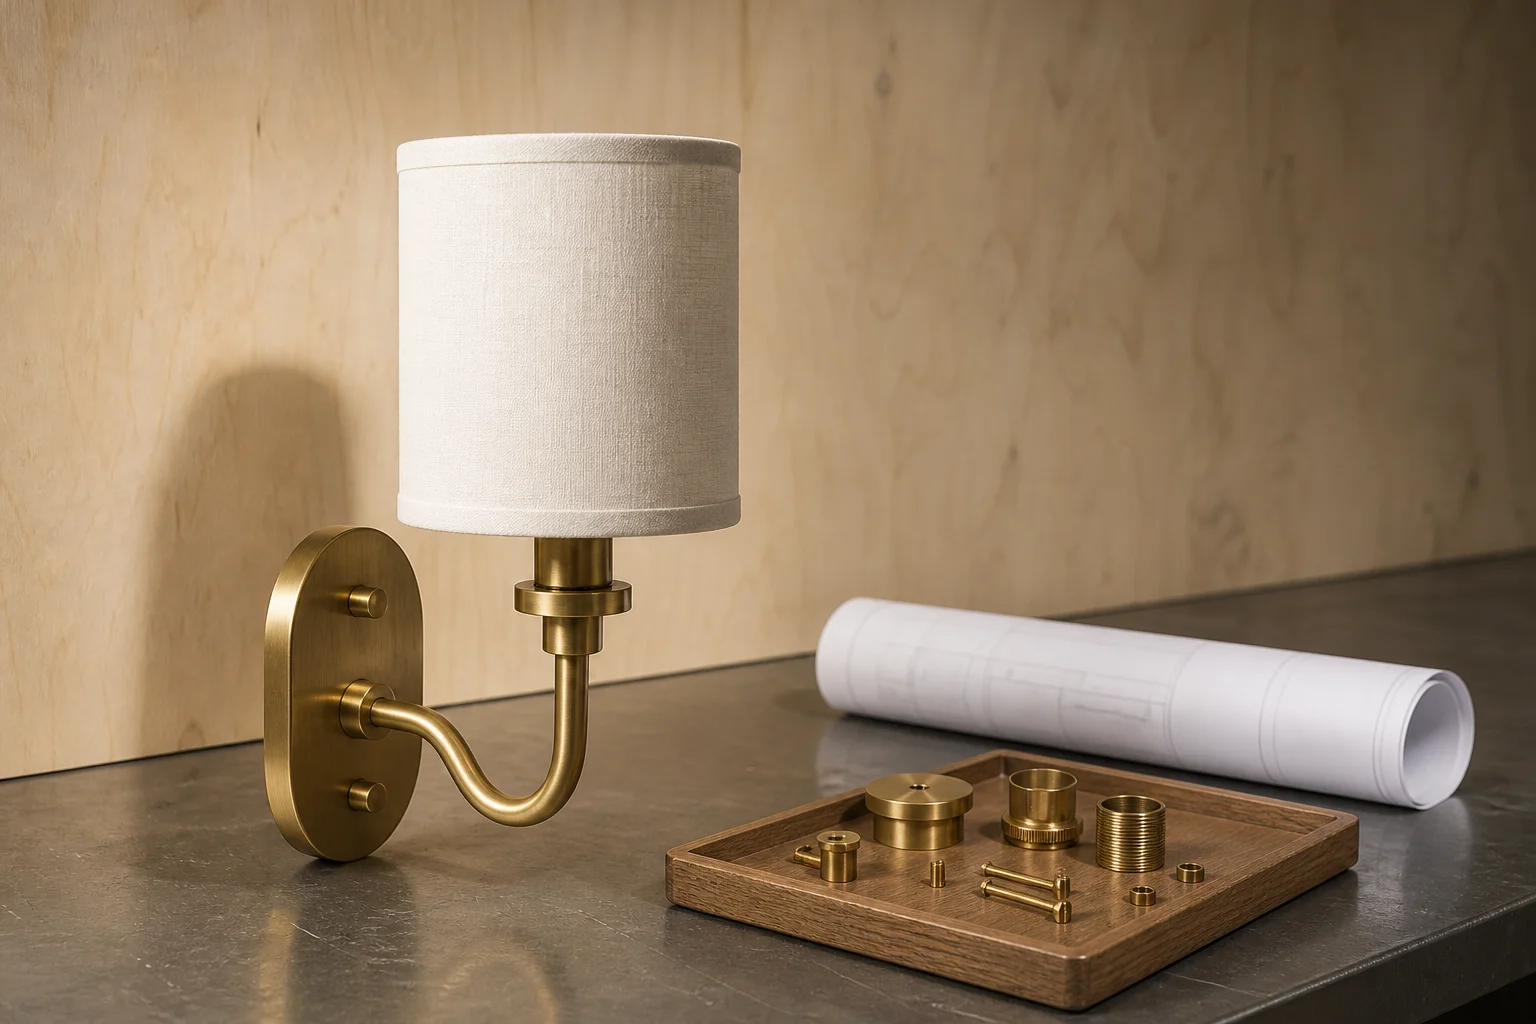
Numbered tags and a direction arrow on the arms of a modular chandelier laid out for assembly
Numbering and direction marks only earn their keep if both survive crating, freight and the walk to the ceiling.

Where modular chandelier assembly numbering breaks down

Most schemes are designed at the factory bench, where the parts sit on one table and the person applying the marks designed them. They break at four points after that.

Packing. Crates are packed by size and weight, not assembly order, so the base plate often leaves in a different crate from its arms.

Unpacking. Labels sit on the face easiest to reach in the workshop, which is often the face that ends up against the crate wall.

Distribution. Crates get split by floor or by room, so one fixture's parts end up in three locations.

Handover. The crew receiving the goods rarely attended the mock-up. Meaning that lives in a conversation leaves with the person who had it.

The test is one question: could an installer who never spoke to the factory build the fixture from the marks alone? If the answer depends on a phone call, the scheme is documentation, not identification.

What a module ID has to encode

An identifier is not a serial number. It answers five questions at once, each read by a different person on site.

  • Fixture tag, so two identical chandeliers in one lobby do not exchange parts: LOB-A and LOB-B, not "chandelier".
  • Tier or level, because an arm for tier one fits tier three and looks wrong.
  • Position within the fixture, counted in one stated direction from one stated start: clockwise from the cable entry works, left to right does not.
  • Orientation reference, a separate mark dealt with below.
  • Revision or batch letter, so a part made after a design change is distinguishable without measuring.

Keep the string short enough to write by hand, because replacements are when the scheme matters most. Avoid pairs that are misread in poor light or relayed wrongly by phone: O and zero, I and one.

Direction marks are the part installers actually need

Position tells an installer which arm; direction tells them which way round. On asymmetric fixtures many parts fit two ways and only one is right. A rotated arm still bolts up, still photographs acceptably from the lift, and is discovered when the room is lit and the throw runs the wrong way.

Use two independent cues: a physical one that cannot be removed, such as a stamped arrow or a notch at the reference point, plus a word that removes ambiguity, such as ROOM or WALL. Adhesive arrows rotate when the label is applied at an angle, and a word alone is unreadable behind a diffuser.

Direction marks should also reference the building. On a sloped ceiling, marking the room-facing side of the canopy and repeating it on the installation drawing stops a chandelier arriving level but rotated.

If two installers can look at the same mark and disagree about which way the arm faces, the mark has failed. The fixture is not at fault.

Crate mapping ties boxes to build order

A packing list says what left the factory; a crate map says how to build, starting from the assembly sequence: what must be on the floor first, what is needed only at the final lift, what should stay crated.

Make the manifest per fixture rather than per shipment, so a split delivery does not leave the site guessing which unit is incomplete. Designate a first-open crate with the hardware, template and installation sheet. Where weight limits split a fixture across crates, put a kit card in each naming the fixture tag, crate number and total crate count.

For repeated guest room fixtures, per-room kits repay the effort: forty identical pendants shipped in bulk are mixed within an hour of opening.

Marking methods that survive crating and handling

Choose the method from the surface it must sit on, not the cheapest option. A label that peels in transit is worse than none, because it leaves adhesive on a finished surface.

MethodWhat it survivesWhere it failsBest used for
Stamped or engraved plate, mechanically fixedHandling, stacking, most cleaningSmall parts with no flat facePermanent IDs on structural parts
Laser etched into the metalThe life of the partDark or reflective finishes, where contrast is lowSmall arms and connectors
Printed polyester labelClean, flat, non-oily surfacesTextured or oiled surfaces; edges lift firstBatch, room and crate references
Hang tag on wire or tieCrating and transportAnything the tag must stay attached to after unpackingHardware bags and loose components
Marker pen on tapeVery littleHeat, handling, any surface that gets wipedNothing that must be traced later

Placement matters as much as durability. Marks belong on faces visible during assembly and covered only when the fixture is complete; crate labels on two adjacent faces.

Drawings and handover checks

A numbering scheme without a drawing is decoration. The sheet carries the same identifiers in an exploded view, sequenced in build order. One sheet per fixture type; a generic sheet covering several variants is where mistakes start.

Revision control is the part most often skipped. If the drawing is revised and the parts are not remarked, the site has two sources of truth. The letter belongs on the title block and on every affected part, with a line describing the change. After the mock-up, update to as-built and reissue.

Most failures are visible within the first hour of unpacking.

  • Count components against the per-fixture manifest, crate by crate, before anything is unwrapped.
  • Build one fixture flat on the floor using only the marks and the drawing.
  • Read every mark at arm's length under the light actually available on site.
  • Photograph marks and crate labels as found, so a missing part can be identified later.
  • Agree the missing-part protocol in advance: a photograph of the mark, the fixture tag, the crate number and one named contact on each side.

A part that arrives unmarked is non-conforming, not a puzzle. Trial fitting to find where it belongs is how finishes get damaged.

FAQ

Should module IDs stay visible after installation?

No. Position and orientation marks belong on faces hidden once the fixture is closed. Keep one discreet service reference inside the canopy, so maintenance can identify the fixture without dismantling it.

Who should own the numbering scheme, the factory or the installer?

The factory proposes it, because it knows how the fixture is built and packed. The installer approves it at the mock-up, because it knows what is readable from a lift. One approved scheme is workable; two is how records stop matching.

What should happen when a component arrives unmarked?

Treat it as non-conforming and photograph it before handling it further. The fixture tag and crate number usually narrow the possibilities enough for the factory to identify the part from its packing record.

Is colour coding a substitute for numbering?

No, though it is a useful secondary cue. Colour is affected by site lighting, colour vision differences and any on-site refinishing. Alongside an identifier it speeds sorting; instead of one, it produces confident mistakes.

How does numbering change with many identical fixtures?

Add a room or zone prefix to the fixture tag and keep the manifest per fixture. Identical fixtures are where mixing is most likely and least visible, because every part fits every unit.

The takeaway

Assembly problems on site are usually identification problems, not manufacturing problems. A scheme that encodes fixture, tier, position and revision, adds a direction mark with two independent cues, and travels with a crate map built around the assembly sequence will survive crating, freight and a change of crew. Choose the marking method from the surface, keep drawing and parts on one revision letter, and check the marks in the first hour of unpacking. All of it has to be decided before the crates are sealed, because after that the scheme is whatever the labels say it is.

Zerouno Lighting (ZeroUNO) manufactures hospitality decorative lighting in Zhongshan, China, and has supplied custom fixtures for hotel projects since 2013. Custom work typically starts from a single-piece sample before a production run, with quoted lead times of 25 to 35 days depending on the specification. Learn more at zerounolighting.com.

About the author

Sonny Yu is Sales Manager at Zerouno Lighting, working with hotel owners, designers and procurement teams on decorative lighting for guest rooms and public areas. He writes about the details that decide whether a fixture reaches the ceiling on schedule.

2026年10月21日星期三

Emergency Lighting and Decorative Fixtures in Hotels

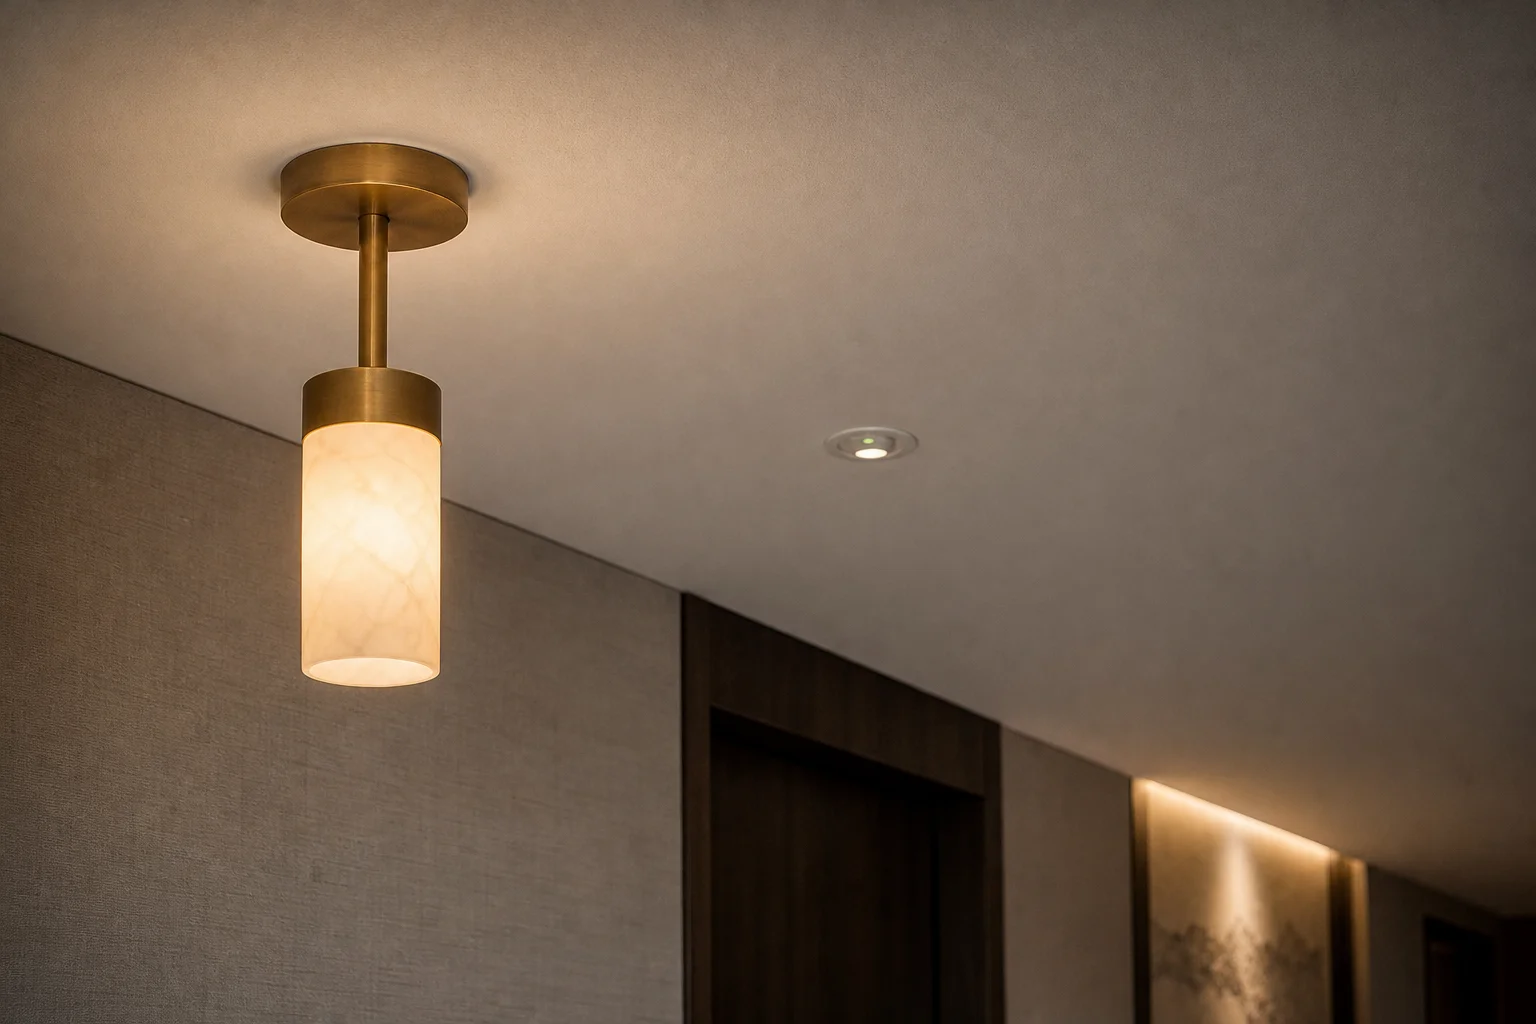
Decorative pendant and recessed emergency downlight on one hotel corridor ceiling
Two lighting systems share one ceiling plane, and the seam between them is where projects lose time.

A hotel ceiling usually carries two lighting systems at once. One is decorative: pendants, wall luminaires, cove details, the layer the designer draws and the owner approves in a mock-up. The other is the emergency layer that keeps the escape route legible when the normal supply fails, owned by the fire strategy and approved through a separate chain. They come from different suppliers, are installed by different trades, and are commissioned by different people.

Most problems I see on site are not failures of either system. They are failures of the seam: a decorative fixture wired to a dimmed circuit, an emergency device hidden behind a pendant, a battery nobody can reach. This guide is for owners, designers and procurement teams settling the decorative package while emergency lighting is specified elsewhere.

Two systems, one ceiling

The decorative layer answers questions about appearance, scenes and guest comfort. The emergency layer answers a life safety question, and its requirements are set by local code and the project's fire strategy, interpreted by the fire engineer. A lighting supplier shapes the decorative layer and can make a fixture compatible with an emergency system, but cannot design the emergency layer or certify a route.

The boundary therefore has to be written down before either package is ordered: zones, device positions, circuit allocation, and who owns each item at commissioning. Projects that skip that page usually find the gaps at final inspection, when the ceiling is closed.

Pick the emergency approach first

Three routes are common, and each changes the decorative design differently. The choice belongs in the first design meeting, not in value engineering.

ApproachWhat it does to the ceilingBest fitVerify early
Dedicated emergency device beside the decorative schemeIndependent luminaire, own feed and supplyCorridors and back-of-house with repetitive layoutsWhether its appearance sits with the decorative language, and whether it clashes with a pendant
Approved kit integrated into the decorative housingCeiling looks unchangedLobbies and suites where a second device would hurt the designRoom for gear and battery, lamp heat, and battery access after installation
Central battery system, dedicated final circuitGear sits away from the ceilingLarge properties with expensive access in guest areasCircuit routing, separation from every dimmer, labelling at the board

One rule prevents most rework: do not convert a decorative fixture on site. Adding a kit to a housing never approved with it, or drilling a shade for an indicator, creates a combination nobody has tested, and it is the change most often rejected at commissioning.

Zone the escape route before the scenes

Zoning is usually drawn for decorative scenes and then handed to the emergency designer, which is the wrong order. Zone the escape route first, then map scenes onto those physical zones. Where a decorative boundary cuts across an escape zone, someone will eventually dim half a route while adjusting a lobby scene.

  • Keep the emergency feed unswitched. The device stays live whether the scene is on, off or fading.
  • Show two feeds. Switched or dimmed live and permanent live arrive at the same ceiling, and both belong on the drawing.
  • Sensors serve the decorative layer only. A sensor that drops a corridor into darkness is a design fault even when the emergency layer works.
  • Do not let a scene go to zero on a route. A low night scene is fine; removing wayfinding light is not.
  • Label both ends of every emergency circuit. At the board and at the ceiling, not only on a drawing nobody brings to site.
Switch every decorative scene off, then walk the escape route. If you cannot read the route, the design has been borrowing light from a system that will be switched off.

Put the gear where it can be maintained

Emergency gear is maintenance hardware. Batteries age, kits fail, and each event needs a person with a platform in the right place. The failure I see most is not a dead battery but a battery above fixed joinery, behind closed plasterboard, or between pendants that cannot be moved without dismantling the run.

  • Does the void have depth for the gear, the battery enclosure and its connector?
  • Is there an access hatch above each device, sized for a hand and a tool?
  • Does the decorative fixture shed heat into that void, and is the gear rated for it?
  • Can the device be reached from a standard platform without closing the corridor?

Appearance belongs to the same decision. Emergency devices rarely match a bespoke decorative finish, so agree whether the visible unit is surface mounted, recessed or integrated, and put it in the finish schedule where the designer will see it.

The interface register

A short table attached to the lighting package, naming the points where the two packages must agree and who owns each one.

PointWhat goes wrongAgree in writing
Circuit allocationEmergency device lands on a dimmed circuitWhich circuits serve which devices
SwitchingIntegral kit wired to switched live and dies with the scenePermanent live to the emergency input, and who terminates it
Cut-outsDecorative and emergency positions clash lateOne ceiling plan with both layers
Gear locationBattery sealed behind plasterboardHatch positions and sign-off
Visible finishDevice arrives in a different toneFinish approval at sample stage
LabellingNobody can identify the circuit at the boardStandard and who applies it
CommissioningTwo trades each assume the other tested itOne named owner of the record
DocumentationAs-builts show the design, not the ceilingRed-lined drawings in the handover pack

Commissioning, and where it slips

Commissioning is a sequence, not a visit. Agree zone drawings, mark emergency positions on the fixture schedule, coordinate first fix so back boxes and feeds arrive in the right places, approve the sample with the emergency device in frame, install, commission with the fire engineer present, then hand over the record and the test regime.

Slips cluster in two places. At the sample stage, the mock-up is approved without the device in view, so it appears for the first time on a finished ceiling. At handover, the commissioning record exists but no maintenance regime does, so the operator inherits hardware with no schedule. Testing frequency and duration belong to local code and the fire strategy, and the operator's log is the evidence. The supplier's part is narrower but concrete: make the device reachable, make the part identifiable, document the approved combination.

What the package should document

A decorative package that arrives with only a finish schedule leaves the contractor to invent the interface. These items close the gap:

  • One ceiling plan showing decorative and emergency positions.
  • A fixture schedule marking which positions are emergency, and by which route.
  • A feed schedule separating switched, dimmed and permanent live.
  • Gear locations with hatch positions and sizes.
  • Approved finishes for every visible device, emergency ones included.
  • Spare parts and replacement references for the devices most likely to fail.

FAQ

Can a decorative pendant also be the emergency light?

Only where an approved kit has been tested with that exact housing and the combination is documented. Confirm it with the fire engineer before the fixture is ordered, and never by fitting a kit on site.

Does the emergency layer need a separate visible fitting?

No. A dedicated device is simply the easiest route to approval, because the decorative design cannot affect it. Integrated kits and central battery systems are legitimate alternatives, provided the details are settled at design stage.

Who decides where the devices go?

The fire engineer, working from the escape strategy and local code. The decorative layout adapts around those positions, which is why pendants and coves move when the emergency plan arrives late.

Can emergency lighting join a decorative dimming scene?

No. It stays on a permanent live feed and must not respond to any scene, including a master-off command. That is a wiring and zoning decision, not a programming one.

Who tests it after handover?

The operator, following the regime in the fire strategy and recording results in a log. The supplier's job is to make that regime physically possible: reachable devices, identifiable parts, documentation that matches site.

The takeaway

Decorative and emergency lighting fail together at the seam, not inside either system. Settle the emergency approach before the decorative layout is frozen, zone the escape route first and map scenes onto it, and put the gear where a technician can reach it. Then write the interface down: circuits, switching, access, finishes, commissioning and documentation, each with one owner. Guests notice the decorative layer, but the seam decides whether the ceiling passes inspection without being opened twice.

Zerouno Lighting (ZeroUNO) manufactures hospitality decorative lighting in Zhongshan, China, founded in 2013 with a team of 120. The company builds pendants, wall luminaires and custom decorative fixtures for hotel projects, samples from a single piece, and typically delivers custom orders in 25 to 35 days, with a two-year warranty and a 48-hour response commitment. Learn more at zerounolighting.com.

About the author

Sonny Yu is Sales Manager at Zerouno Lighting, working with hotel owners, interior designers and procurement teams on decorative lighting packages. He writes about the part of hotel lighting that only appears after the drawings are approved: interfaces with other trades, sampling, finish consistency and handover documentation.

2026年10月20日星期二

Hotel Lighting Handover Documentation: O&M Pack Contents

A hotel opens, the lighting is commissioned, the contractor demobilises, and three months later a housekeeper reports a flickering bedside reading light. Someone opens the project folder looking for the fixture schedule and finds an issued-for-construction PDF that no longer matches anything on the wall. That gap between what was specified and what was installed is why handover documentation exists.

This article is about the lighting O&M pack: what a maintenance team needs inside it, what is just weight, and how to build it before the last fixtures leave site. It is written for hotel owners and project teams who receive the pack rather than produce it, and it stays separate from the punch list, since closing defects and documenting a system are different jobs.

Write the pack while the site is still open

Documentation written after handover is reconstruction, not record. The installers have moved on, the room numbers have changed twice, and the person who knew where the remote drivers went has left the subcontractor. The working window is the final weeks of installation, while ceilings are still accessible. Use it to capture what cannot be recovered later:

  • Photograph every fixture type in position, including the ceiling interface and any access hatch.
  • Record as-built circuits and control zoning against the room numbers on the doors.
  • Note each remote driver's location and photograph the route a technician would take to reach it.
  • Keep the finish sample from the last batch, labelled with reference and approval date.
  • Log the exact carton and fixture label wording, because that is what a storeman searches for.
  • Name the site contact who can still confirm a part number after handover.
A handover pack is not judged by how thick it is. It is judged by whether a technician who has never seen the building can find the driver behind a given fixture in under ten minutes.

The six sections a lighting O&M pack actually needs

Most packs fail in two directions: a marketing folder with a drawing stapled to it, or a five-hundred-page dump of every submittal ever issued. Neither helps a duty engineer at eleven at night.

SectionQuestion it answersWho uses it
Fixture registerWhat is installed, where, and what is inside itMaintenance, purchasing
As-built drawings and control zoningWhat is really on the ceiling and which switch controls itEngineering, electrical contractor
Driver and access mapWhere the gear is hidden and how to reach itDuty technicians, MEP team
Spare parts and finish recordWhat we hold, and what the approved finish looks likeStores, purchasing, housekeeping
Service statementWhat is covered, for how long, and who to callOwner, operator, procurement
Care instructions by materialHow to clean it without destroying itHousekeeping supervisors

Six sections also define what to leave out: the catalogue and quotation, because pricing belongs in the contract file; undated drawings, since a superseded sheet in a live folder is worse than a missing one; and duplicate statutory paperwork. If a technician cannot act on a page, it belongs elsewhere.

The fixture register is the spine of the whole pack

If only one section survives, it should be the register. One line per fixture type: the tag that appears on the fixture, room types and quantities, finish reference, light source and driver reference, and the supplier's item reference. Drawing callouts, spare parts, warranty claims and replacement orders all hang off those tags.

Two failures are common. A register that lists quantities supplied rather than installed cannot be reconciled against a walk-through, and quietly hides site losses and attic stock. A register whose tags exist only in the spreadsheet leaves the technician at the fixture unable to connect the object to the line. Reconciling has to be done on foot: take the register into three sample rooms of different types, find every line, and mark what cannot be found.

As-built drawings are not the issued drawings

Issued drawings describe intent; as-built drawings describe the building. Between the two sit a beam that moved for a sprinkler drop, a ceiling that came down by a hundred millimetres, and a room numbering scheme changed after the signage was printed. All of it makes the issued set useless for maintenance.

An as-built set need not be redrawn in CAD, but it needs three properties. It must be dated. It must be marked with what changed rather than reissued under a fresh title block. And it must carry control zoning as actually wired, panel by panel, because the question at a front desk is never which fixture is which but which switch turns the cove off without killing the reading lights. Aiming records stay with the design intent file, referenced rather than absorbed.

Drivers, access and the ten-minute rule

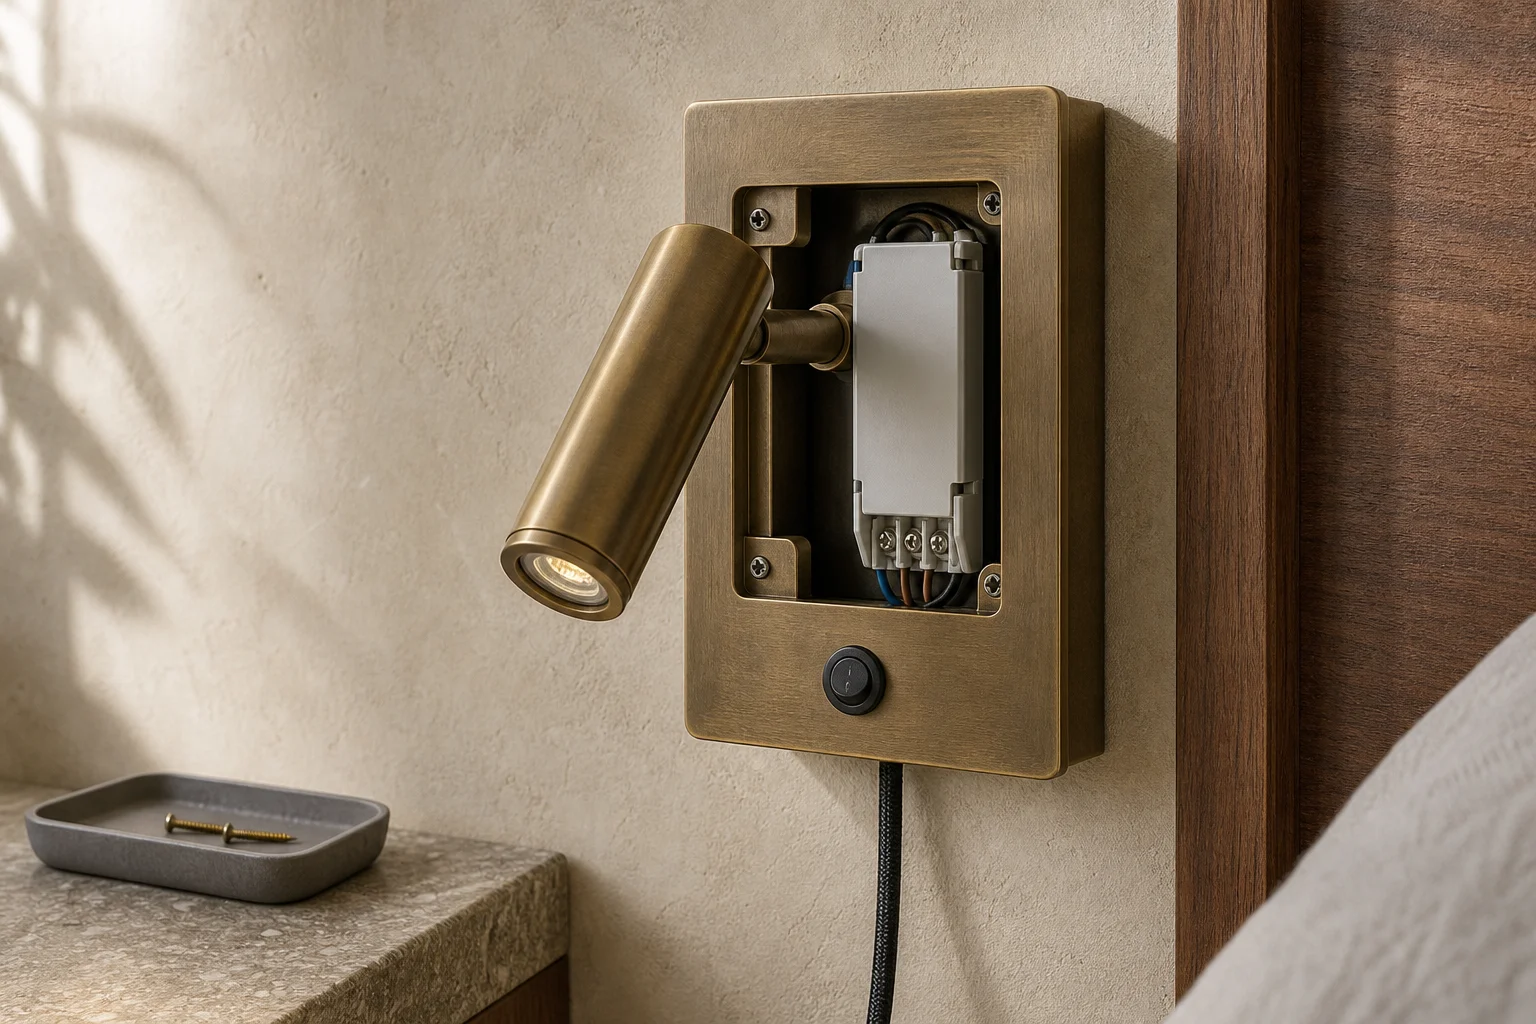
Wall-mounted hotel bedside reading light with its access plate removed, showing the LED driver
A driver is only serviceable if the pack records how to reach it, not just where it was drawn.

Decorative fixtures increasingly carry their electronics remotely, which is good for heat and bad for maintenance if nobody recorded where the gear went. A driver above a fixed plaster ceiling with no hatch turns a five-minute swap into a ceiling opening, a redecoration, and a conversation about who pays.

The access map is the section technicians use most in year two and it is almost always the thinnest. For each fixture family, state where the driver sits, whether access is a hatch, removable panel or lift, and which isolator is locked off first. Where the route passes through another trade's riser, say so, because that is where the work order stops. If a driver cannot be reached without destructive work, write that down too: an operator needs it to hold a retention or negotiate a hatch.

Spares, finishes and the colour record

The spare parts list is a commercial decision expressed as a technical document. What matters is what was handed over, where it is stored, and what it fits. A spare that exists but cannot be located is not a spare.

Finish is where documentation earns its keep years later. The same finish name across two purchase orders is not proof of a match: plating baths drift, powder batches vary, and patina develops at different rates with handling. The only arbitration tool that survives is a retained physical sample, labelled with reference, batch and approval date, and kept with the spares. For natural materials it records an approved range, not an exact match, and the pack should say so. Stone and alabaster vary between blocks; a replacement shade will not be a twin, and a document that pretends otherwise turns a material property into a complaint.

Sign-off, and what the signature actually covers

Handover signatures cause disputes because two confirmations get conflated. Signing for documentation confirms that the listed sections were received, that the revision is identified, and that the register reconciled against the sample rooms on the stated date. It does not confirm that the installation is free of defects, and it does not transfer the defects liability period. Those sit with the punch list and the contract.

A short acceptance walk makes the signature meaningful. Take the register into one room of each principal type, confirm three fixture lines end to end (tag, part reference, access route), check zoning against the panel, and confirm the spares are in the store. Record the date, pack revision, and two named contacts, one commercial and one technical.

FAQ

Who should own the lighting O&M pack after handover?

The operator's engineering department should hold the controlled copy, with the owner's project team keeping the contractual set. Ownership matters less than control: one nominated person should know which revision is current and where the finish sample is stored.

How long should the pack be kept?

For the life of the installation, and well beyond the warranty period. The register is often the only surviving record of a discontinued item.

Can a digital folder replace a printed pack?

For drawings and registers, yes, provided the folder is reachable from the plant room and the file names match the site tags. The finish sample cannot be digitised, and a photograph carries no material reference.

What if the as-built drawings were never produced?

Commission a measured survey of fixture locations and zoning rather than reissuing the original set. It is a smaller job than it sounds, and a dated survey is more honest.

Does the pack need to state spare parts quantities?

It should state what was handed over, unit by unit, even where the agreed holding is zero. Recording a deliberate zero prevents the same conversation at every future failure.

The takeaway

Handover documentation is the operating manual for a system that outlives everyone who built it. Assemble it while the site is open, keep it to six working sections, and make the register reconcile on foot. Record the driver access route as carefully as the finish, retain a physical sample with its batch, and state plainly what the signature does not confirm. That pack beats a folder that only satisfies a checklist.

Zerouno Lighting (ZeroUNO) manufactures hospitality decorative lighting in Zhongshan, China, and supports hotel projects from sampling through to handover documentation. Custom orders typically run 25 to 35 days, and our warranty statement covers two years with a 48-hour response commitment. Learn more at zerounolighting.com.

About the author

Sonny Yu is Sales Manager at Zerouno Lighting, working with hotel owners, designers and procurement teams on decorative lighting for guest rooms, corridors and public areas. He writes about the practical side of delivering hospitality fixtures, from sampling and finish approval to the paperwork that keeps a building serviceable after opening.

2026年10月19日星期一

Canopy Details for Sloped and Coffered Hotel Ceilings

The detail that most often comes back to bite a hotel lighting package is not the chandelier. It is the twenty millimetres of daylight between a round canopy and a ceiling that turned out not to be flat. Vaulted suites, attic-level rooms, coffered lobbies and raked corridor ceilings all put the canopy against a plane that the shop drawing quietly assumed was horizontal.

This article is for the people who close that gap before anything is machined: owners signing off shop drawings, designers setting ceiling intent, and procurement teams checking that the canopy they bought can sit on the ceiling that was built. It covers what to measure, which canopy families survive an incline, how a coffer changes the problem, and what a mock-up must prove.

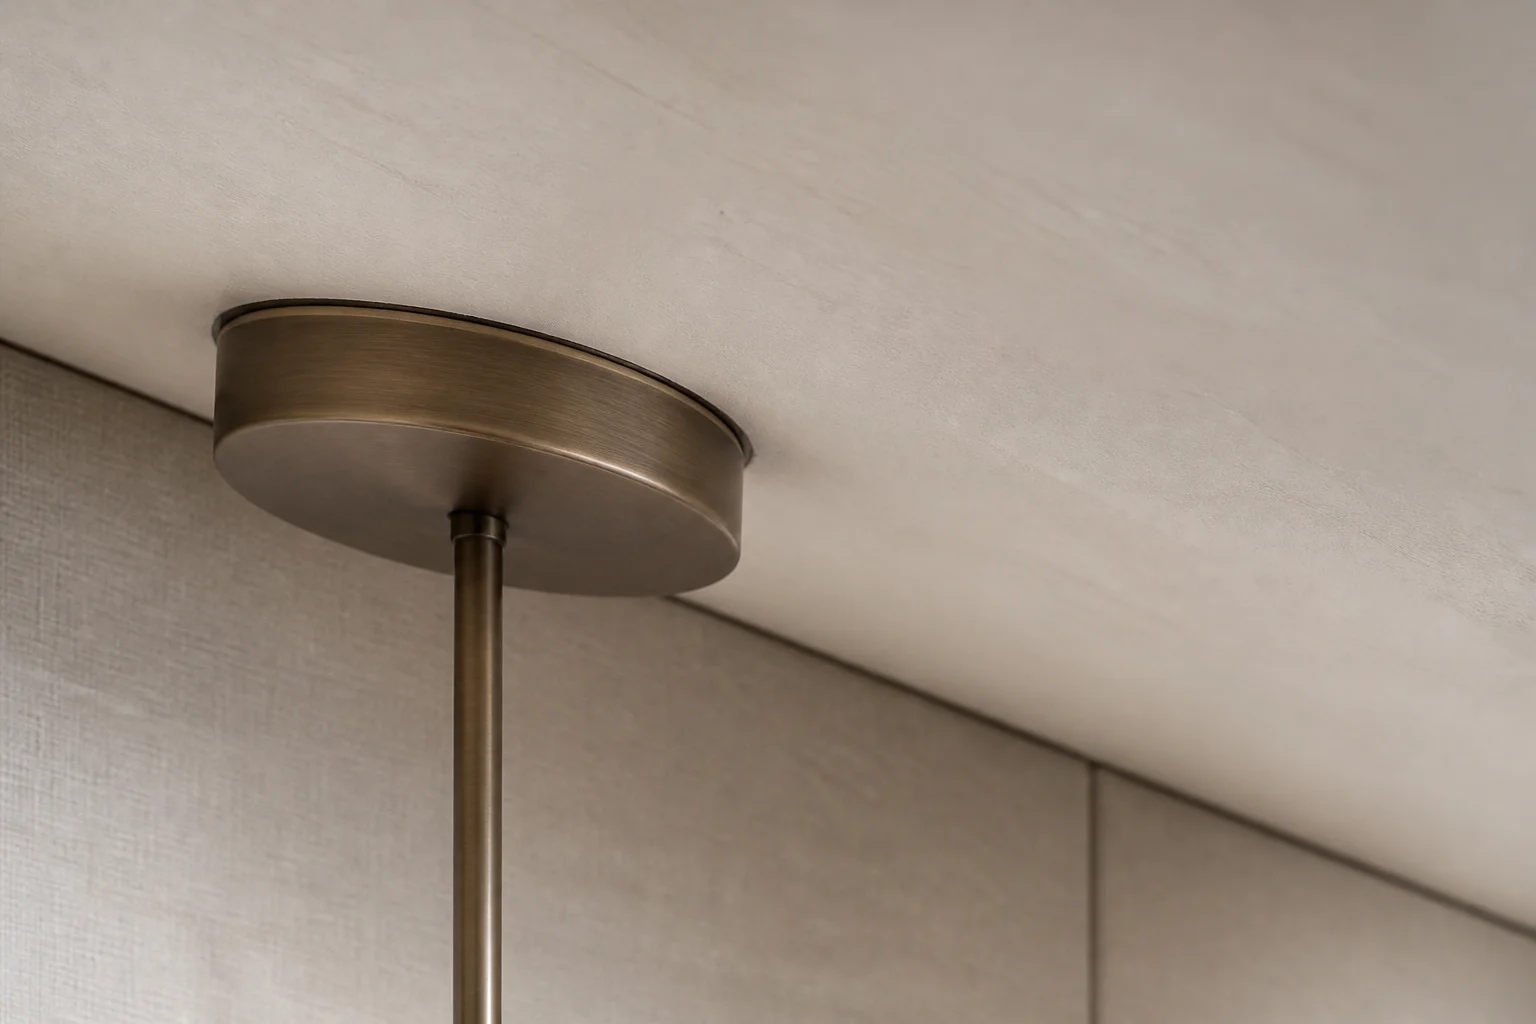
Brushed bronze pendant canopy sitting flush on a sloped plaster ceiling with a plumb stem
The canopy follows the ceiling plane; the stem has to follow gravity. The joint between them is where the detail is won or lost.

Why a sloped ceiling breaks a standard canopy

A standard canopy is a shallow cylinder built for a flat plane. Its contact ring is a circle, and on a level ceiling that circle touches the plaster evenly. Tip the ceiling a few degrees and the same ring meets the plane at an angle: the canopy bites into the plaster downhill and opens a wedge-shaped gap uphill. The gap grows with canopy diameter, not with how small the slope looks on paper.

There is a second, quieter failure. The canopy links ceiling to stem, and on a raked ceiling the mounting surface is no longer perpendicular to the load path. Screw it tight to the incline, fix the stem square to the canopy, and the fixture hangs off plumb. Nobody notices in a photograph; everybody notices beside a door frame or a mirror.

The rule that resolves both problems: the canopy follows the ceiling, the stem follows gravity, and the joint absorbs the difference. Any detail making canopy and stem rigidly parallel fails on one of the two.

What to measure before anyone draws the detail

Canopy geometry cannot be confirmed from a reflected ceiling plan. The slope on the drawing is nominal and the built ceiling is usually something else. Someone has to stand under the fixing point and record numbers.

  • Slope on two axes. A hip or vault can slope in two directions; a single-axis pivot still gaps on the other.
  • Direction of fall. The uphill side is where the gap appears, so it decides which way a wedge or pivot must work.
  • Substrate and build-up. Skim on board behaves differently from skim on concrete; the fixing must reach structure.
  • Blocking position. Whether it exists at the fixing point, and whether it is set square to the slope or the horizontal.
  • Coffer depth and beam faces. Recess depth, beam width, and clear distance from fixture centre to the nearest beam.

Record it on a signed survey sheet that travels with the order; when a canopy must be re-machined, the argument is always about who measured.

Canopy families and where each one works

No single canopy suits every slope. The families below trade visual weight against tolerance.

Canopy typeHow it handles the inclineWhere it fitsWhat to watch
Standard flat canopyNot at all; relies on a shim or accepts a gapLevel ceilings onlyShims compress and creep; the gap returns
Machined wedge adapterCut to the measured angle, full contact faceSingle-pitch slopes, repeated across many roomsOnly as accurate as the survey; new angle means a new part
Pivot or swivel canopyCanopy tilts on a seat while the stem stays plumbVaults and two-axis slopesNeeds a defined tilt range and a positive lock
Deep collar or extended skirtDepth swallows the gap instead of closing itShallow coffers, uneven plaster, retrofitReads heavier from below; check against design intent
Recessed ceiling platePlate set into the ceiling, canopy sits insideCoffers with a flat recess baseCeiling contractor coordination; tolerance stack
Bracket off structureFixture hangs from a bracket; canopy becomes a coverHeavy fixtures, deep coffers, beams in the wayBracket must be engineered, inspected, then hidden

Coffered ceilings: a flat base is not an easy detail

A coffer looks like the friendly case because the recess base is usually flat. In practice it adds four constraints: beams on every side, limited depth, a datum question, and a judgement about what "centred" means when a guest looks up from the bed rather than the door.

The datum comes first. A fixture can be centred on the coffer, on the room, or aligned to the bed. These are rarely the same point, and the difference is visible from the pillow even when it is invisible on the plan. Decide before the ceiling grid is set, because afterwards the only options are a longer arm or a moved fixture.

Depth comes second. The canopy must clear the beam soffit; if it projects below that line the fixture seems to grow out of the beam, and no finish work fixes it. Measure rod length from the coffer base, never from the soffit, then check it against the door head on the same elevation. Third, keep the canopy off the beam face, or it throws a hard shadow line that reads as a defect at night.

Clearance, access and the maintenance path

The canopy is not only a visual cap. It is the access hatch for the terminal block, the earth connection and, on integral fixtures, the driver. On a slope the interior volume turns asymmetric: one side deep, the other nearly closed. That decides whether a technician can reach the terminations in place, or whether the pendant comes down for a driver change.

So keep wiring reachable from below rather than from the side facing the slope, and settle early whether the driver is remote or integral, because a remote driver turns a canopy problem into a ceiling access problem. Confirm the reach height too: a canopy near the top of a raked ceiling in a double-height space is a different proposition, and housekeeping finds out first. This is where a supplier's response commitment becomes a specification item rather than a promise.

Approving the detail: what the mock-up has to prove

A shop drawing and a mock-up answer different questions. The drawing proves the geometry was calculated; the mock-up proves it against the ceiling that exists.

The drawing should carry the measured angle on both axes, the canopy family, the tilt range where a pivot is used, the permitted gap at the uphill edge in millimetres, the fixing method, and the finish reference. If the permitted gap is not written down, the site defines it by complaint.

The mock-up mounts the actual canopy on a board cut to the measured angle and is photographed from below at guest eye height with the room lighting on. Two things get checked: the gap on the uphill side, and the shadow the canopy casts on the plaster. Both are cheap to fix on a sample board and expensive across two hundred rooms. That is the argument for sampling a single piece at the measured angle rather than at nominal zero.

FAQ

Can we just shim a standard canopy on a slope?

Not permanently. Shims concentrate load, compress over time, and leave the canopy sitting on a stack of material. Use a machined wedge or a pivot canopy, both of which present a full contact face to the plaster.

The slope is only a few degrees. Does it matter?

Yes, because the gap scales with canopy diameter. A small angle across a wide canopy still leaves a visible gap and an uneven shadow line, which reads as fitting error rather than building condition.

Who owns the canopy detail?

The designer owns intent: canopy style, ceiling plane, how the fixture should read. The supplier owns geometry: measured angle, tolerance, fixing. The contractor owns the substrate. Failures sit in the handover between the three.

Can a coffered ceiling take a standard pendant?

Usually, if the coffer base is flat and the recess deep enough to clear the beam soffit. The binding constraints are beam proximity and the rod-length datum.

What if the ceiling is not built when we order?

Order against the design slope, then set a hold point: confirm the measured angle before machining. Without it, a supplier either machines twice or ships a nominal part and lets the site absorb the difference.

The takeaway

On a sloped or coffered ceiling the canopy is a geometry problem, not a finishing item. Measure the angle on both axes on site, choose a family that separates ceiling plane from plumb line, and write the permitted gap into the drawing. Prove it on a sample board shot from the guest's eye line before the run starts. None of those steps is expensive; skipping them is.

Zerouno Lighting (ZeroUNO) manufactures hospitality decorative lighting in Zhongshan, China, and machines canopies to a measured ceiling angle rather than a nominal one whenever a project supplies the survey. Single-piece sampling lets a design team prove the ceiling interface before a full run, and bespoke orders typically run twenty-five to thirty-five days from approved drawings. Learn more at zerounolighting.com.

About the author

Sonny Yu is Sales Manager at Zerouno Lighting (ZeroUNO), working with hotel owners, designers and procurement teams on decorative lighting packages. He writes about the details that decide whether a fixture looks correct on site: ceiling interfaces, finish matching, and the documentation that keeps a project on schedule.

2026年10月18日星期日

Hotel Chandelier Installation: 10 Gates Before It Ships

A hotel lobby chandelier is usually approved as a rendering: a ring of light in a double-height space, photographed at dusk. Eighteen months later the coffers are closed, the ceiling plan is frozen, the floor is polished, and four crates sit on the loading dock. Almost nothing that goes wrong then started on site; it started in the approval file, when the fixture was still drawings nobody had matched against the building.

This guide is for the owner's representative, project manager, procurement lead and lighting designer coordinating a large decorative fixture. It sets out ten gates that decide whether the installation runs cleanly, who owns each, and what evidence closes it before the crate leaves the factory. The list is unglamorous; the glamour was settled at design stage.

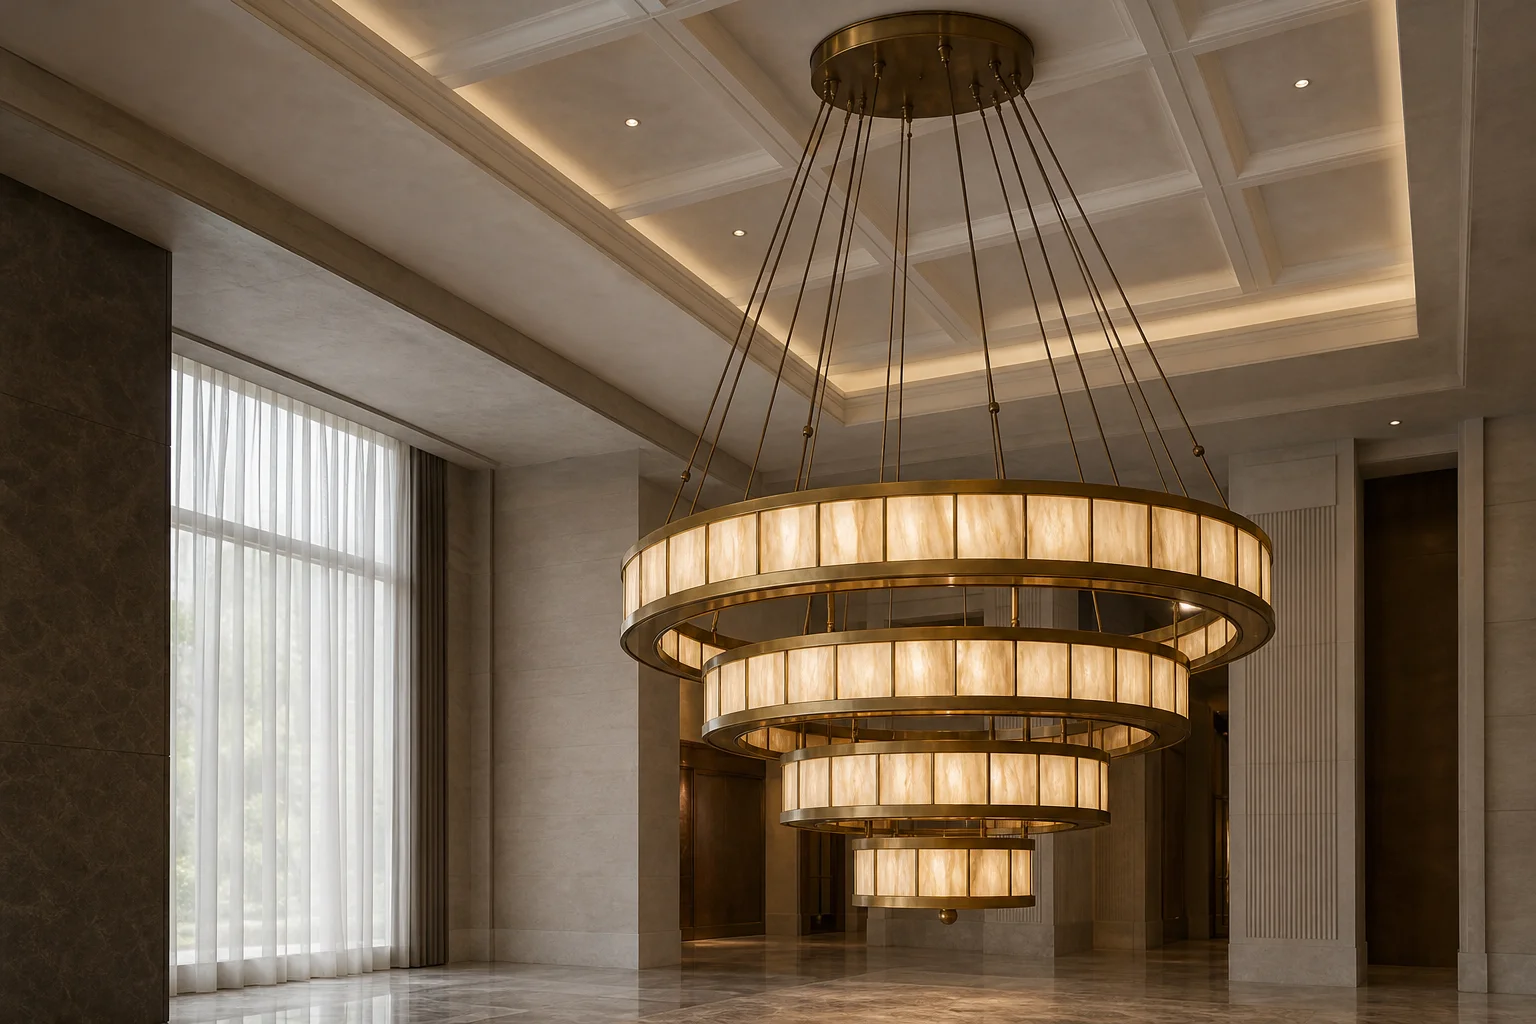
Large tiered hotel lobby chandelier suspended from a coffered ceiling on tensioned rods
Canopy, suspension and drop are one assembly, and each is approved against the ceiling that actually gets built.

Why a large fixture fails before the ceiling opens

Site failures on decorative chandeliers are rarely a workmanship problem. They are a documentation problem that surfaces late, and three patterns repeat.

The load path is assumed rather than proved. The drawing shows a canopy and a suspension detail, but not the weight at each fixing point, the secondary support assumption, or who signs off the structural connection. Once the ceiling is closed, correcting it costs more than the fixture.

The crate order follows factory convenience. Modules, glass, hardware, drivers and spares go into whatever sequence suits the production line, so the installer opens the wrong box first with nowhere safe to put fragile components.

Driver access and zoning are left to the electrical contractor. Nobody has confirmed which tier sits on which circuit, how a driver is replaced without dismantling the body, or where the emergency interface lands. Behind all three sits a cross-owner gap: each party assumes another closed the decision.

The load path has to be proved, not assumed

A weight printed in a decorative description is not a fixing specification. Before production is released, the drawing set should state, for the fixture as it will actually be built:

  • Total weight and the weight carried at each suspension point, not a single figure for the assembly.
  • The suspension method, whether chain, rigid rod, multi-cable or distributed drop, with the hardware named.
  • The canopy interface: plate size, thickness, how it meets the ceiling build-up, and how it is removed for service.
  • The fixing positions in relation to the structural members, not in relation to the visual centre of the room.
  • The secondary support assumption, and the name of the party who approves the connection detail.

The last point is the one projects skip. A ceiling that looks solid is not evidence of structure. On a sloped or coffered ceiling the chandelier's visual centre and the nearest beam rarely coincide, so the fixing survey belongs in the room, on the drawing sent to the factory.

The ten gates, and who closes each

Each gate produces evidence, and the evidence is the point: a gate that is understood but not written down will be reopened on site by someone who was not in the meeting.

GateWhat it provesOwner
1. Final dimensionsFixture size, drop and clearance confirmed against the built opening, not the early drawingDesigner with factory
2. Weight and load pathWeight per fixing point stated and accepted by the structural engineerFactory to engineer
3. Canopy interfacePlate, ceiling build-up and service removal agreed in one detailFactory with ceiling contractor
4. Opening and templateOpening size, reinforcement and ceiling template issued before finishes closeMain contractor
5. Driver accessA maintenance route to the driver exists without dismantling the decorative bodyFactory with electrical contractor
6. Control zoningCircuits, dimming protocol, scene groups and emergency interface fixed by zoneLighting designer
7. Module mapEvery module, drop and decorative group carries a unique number and positionFactory
8. Crate orderPacking sequence matches the installation sequence and the site's storage limitsFactory with installer
9. Site routeLift, door, corridor, stair and staging constraints measured and acceptedMain contractor
10. Installation planSequence, stop triggers, sign-off and spare parts custody written downInstaller with owner

Pack for the route into the building, not for the factory

A fixture that assembles perfectly in a factory hall can still be impossible to deliver. The constraints that decide the shipping format are architectural and cheap to measure: lift cabin dimensions, door heights, corridor turns, stair returns, where a scissor lift can stand, and how much space exists to open crates without blocking a fire route.

Those constraints decide whether the fixture travels as a complete frame, as rings, as branches, or as small modules. A rigid ring is faster to hang and harder to move; a modular fixture is easier to move and demands a module map an installer can follow alone. Neither is better in the abstract: the route decides.

Driver access and control zoning are production decisions

Two conversations belong in the factory, not on the scaffold.

The first is driver access. Whether the driver sits in the canopy, a remote enclosure or a ceiling void, someone has to reach it, isolate it and replace it. If that means removing decorative panels or cutting an access hatch later, the maintenance cost has been designed in and nobody has priced it. A canopy that looks generous on a drawing is unreachable once a beam is in the way.

The second is zoning. A large chandelier is rarely one circuit. Which tiers dim together, which elements stay lit at night, whether the emergency interface takes the whole fixture or one section, and how scenes are labelled all have to be settled while the wiring is made. Afterwards it means a compromise scene or a rewired ceiling.

If nobody can reach the driver, change a component or isolate a section without taking the fixture apart, the installation is not finished, even on the day the light comes on.

Hold points: five questions before the release

Before shipment is released, five questions should have written answers. They are blunt on purpose, because a polite version invites a polite yes.

  • Has the engineer reviewed the load assumption per fixing point, in writing?
  • Has anyone physically checked the ceiling interface, including the reinforcement behind the finish?
  • Does the module map match the crate list, box for box?
  • Has the electrical contractor confirmed how the driver is reached and replaced?
  • Has the hotel or main contractor confirmed the route in, the lifting equipment and the staging area?

If two or three answers are vague, the fixture is not install-ready, whatever the delivery date says. Releasing it anyway moves the uncertainty into a finished building, where it is most expensive to resolve. A delay at the factory is recoverable; a closed ceiling is not.

The release pack should be short enough that a site manager will read it: the sequence by day, module and crate references, canopy details, the circuit schedule, the spares list, and the triggers that require the installer to stop and ask for written clarification. Improvisation in a finished hotel space is how a good fixture acquires a bad reputation.

FAQ

Who is responsible for the ceiling support of a hotel chandelier?

The structure and its connection belong to the project's structural team, not the lighting factory. The factory's job is to state weight and interface clearly enough for that team to approve the fixing. Ambiguity here causes most late rework.

Can a large chandelier be assembled on site from modules?

Yes, and often it must be, because the finished fixture cannot pass through the building. It only works when the module map, numbering and crate order agree, so an installer can follow the drawing without guessing.

How early should the crate order be agreed?

Before production is released, ideally before the design is frozen. The route into the building can change the shipping format, and that can change the module design.

What changes on a sloped or coffered ceiling?

Everything about the canopy. A flat canopy is not automatically suitable for an incline, and an adapter is not automatically suitable for the fixture's weight and wiring. The detail must be reviewed for that fixture and ceiling, including how it is removed for service.

Is a mock-up worth it for a single chandelier?

For a one-off fixture in a public space, a single-piece sample in the final finish and suspension detail is usually the cheapest review available. It exposes canopy fit, light quality at the viewing angle and the maintenance route before the ceiling closes.

The takeaway

A chandelier installs cleanly when the approval file closes the ten gates before the crates are packed. Prove the load path per fixing point, agree the canopy against the ceiling that will actually be built, choose the shipping format from the route in, and settle driver access and zoning while the wiring is on the bench. The designer decides how it looks; a far less visible set of documents decides whether it can be installed and kept lit.

Zerouno Lighting (ZeroUNO) manufactures hospitality decorative lighting in Zhongshan, China, including custom chandeliers for hotel lobbies. Project fixtures start from a single-piece sample, so canopy, suspension and module breakdown are reviewed before production is released; custom lead times typically run 25 to 35 days. Learn more at zerounolighting.com.

About the author

Sonny Yu is Sales Manager at Zerouno Lighting, working with hotel owners, designers and contractors on decorative lighting packages. He writes about the coordination that decides whether a bespoke fixture survives installation: load paths, canopy details and the maintenance access nobody photographs.

2026年10月17日星期六

Hotel Lighting for Sleep: Dimming Through the Night

A hotel room is designed in daylight and judged in the dark. Sample boards are reviewed beside a window at two in the afternoon; the room guests remember is the one they meet at three in the morning, half asleep, trying not to wake the person beside them.

This follows one night in a guest room and sets out what has to be decided, tested and handed over. It is written for the operator signing off a mock-up, the designer writing the control intent, and the buyer wondering why phase three differs from phase one.

Hotel bedside wall light at its lowest warm setting in a dark guest room
The level a guest lives with is whatever the fixture does at the bottom of the dimmer.

A room is judged at 3 a.m., not at check-in

Guests form a first impression in daylight, but the verdict comes in the dark. The complaints that reach an operator are rarely about maximum output. They are about the bottom of the range: what happens between off and a little, whether a control can be found without switching on the ceiling, and whether the room stays dark once the curtain is closed.

That is hard to demonstrate. A full-output photograph proves nothing; two products with identical headline figures can differ in the last ten per cent of travel. The honest test is a fade in the finished room, after dark, on the control the guest will touch.

One night, three moments

The guest room is not one lighting condition. It is at least four, and they are not served by the same settings.

MomentWhat the guest is doingWhat the lighting has to doWhat actually decides it
Evening, before sleepUnpacking, reading, settling inA low pool at the bed that does not reach the other pillowThe bottom of the bedside circuit, not its maximum
Lights outLast page, phone down, settlingReduce light to almost nothing without a step, click or blackoutDimming floor and the shape of the curve
3 a.m.Water, bathroom, back to bedEnough light to cross the room, not enough to wake the bodyNight provision and where its control sits
First lightStill asleep, curtains closedDarkness where the guest believes darkness isCurtain overlap and the gap at the centre

Notice the missing column: colour temperature. Whether a room reads warm or neutral is settled early, with the concept. What decides sleep is how the room behaves at low output.

Where dimming actually fails: the bottom of the travel

Most specification conversation concerns output at full. Almost none concerns the last ten per cent of the rotation, where the guest spends the evening. Three failures account for most complaints, none visible on a summary datasheet.

A dead band. Nothing happens for the first part of the travel, then the light arrives in one jump. The guest expects a small change and gets a large one.

A visible step. The light dims in discernible increments, which is not comfortable on a fixture a metre from a pillow.

A cut-out at the bottom. Below some threshold the driver stops, so the last part of the rotation does nothing and the light snaps off.

A fourth behaviour is worth understanding rather than judging. Some sources shift warmer as they dim; others hold colour and read colder. Neither is wrong, but half and half in one room looks inconsistent, usually because the bedside and the ceiling came from different families.

A dimmer that reaches one per cent on a datasheet and jumps at fifteen per cent in the room has not dimmed. The guest experiences the jump, not the number.

The test is cheap: a full fade in the room, after dark, on the intended control and lamp. Record the lowest level still useful for reading and the level at which the light cuts out. Both belong in the handover pack.

The switch a guest has to find without looking

At three in the morning nobody reads a label. The hand goes where it went at eleven.

A flat panel with no tactile reference is invisible to a hand; a rocker with a physical edge is findable without a glance. It is decided at specification stage and rarely discussed there, yet it decides whether a guest must sit up and switch on a general light to turn off a bedside light.

The standby indicator deserves the same scrutiny. A small blue LED on a touch panel is convenient in daylight and can be the brightest object in the room at night. Facing the pillow, it is no longer an indicator but a light source with no dimmer. Television standby lights behave the same way.

Then there is the conflict nobody owns. A door-card or master switch that kills the whole room, night provision included, means a guest returning in the dark crosses the room to find the card slot. Whether the night light sits on the master circuit is one line in the drawings.

When blackout and the night light work against each other

Blackout is a promise about darkness; a night light is a promise about not walking into furniture. They are usually specified by different people, installed by different trades, and first tested together the night the room is photographed.

The curtain line matters more than the fixture. A night light above the hem of a full-drop blackout curtain washes the ceiling, where a guest lying on their back will see it. Below the hem, the same light spills under the curtain onto the floor.

Reflection is the second trap. A night light aimed across a glossy television panel or a mirror doubles itself, and the reflected patch can land at eye level from the pillow.

The third is the curtain. A gap at the centre overlap, or a track that stops short of the wall, puts a stripe of corridor light across the bed at dawn. It is found in the mock-up or not at all: lie on the bed at night, curtains closed, and look for light that should not be there.

A night walk-through, and what to record

Commissioning is usually a daytime activity with a clipboard and a torch. One evening visit per room type changes what gets handed over.

  • Enter from the corridor with the room dark and note the first thing you can see.
  • Fade each bedside circuit slowly and record where it steps, flickers or cuts out.
  • Lie on the pillow and look at every indicator, sensor and standby LED.
  • Cross to the bathroom and back without touching a general light.
  • Close the blackout curtains and check the centre overlap and both edges.
  • Test the master switch and door card, and confirm which circuits stay live.
  • Write the minimum usable level and the cut-out level into the handover pack.

Bring the operator's representative, the commissioning engineer, and someone from housekeeping. Housekeeping sets the evening state, and a room that is perfect when the technician leaves can be reset to full brightness by a turndown routine nobody documented.

On a phased rollout the handover pack is also the specification for the next phase. A second batch is ordered months later, and the only record of how the first behaved at low level is what was written down.

FAQ

Does warm dimming help guests sleep?

It changes how the room looks at low level, which is why designers use it. It does not replace a low enough minimum, a findable control and a room that stays dark.

What is a sensible minimum level for a bedside light?

It depends on the shade, the source and the room. The workable definition is functional: the lowest level at which a guest can still read without the light reaching the other pillow.

Should the night light be on the master switch?

Usually not, since the point is that it works when everything else is off. Whatever the arrangement, test it with the door card removed and the master switch off.

Can any of this be corrected after opening?

Some of it. Drivers can be replaced, controls swapped and scenes reprogrammed. Wiring routes, switch heights and curtain tracks generally cannot, so settle those before the mock-up is signed off.

The takeaway

Guests do not evaluate a room by its maximum output. They evaluate it at the bottom of the dimmer, in the dark, with one hand: where the dimming floor sits, whether the control can be found by touch, whether the standby light is brighter than the night light, and whether the curtain and the fixture were ever tested together.

None of it is expensive at drawing stage. All of it is awkward once the room is finished. One evening walk-through per room type, with the results written down, is the cheapest insurance on a hotel lighting package.

Zerouno Lighting (ZeroUNO) manufactures hospitality decorative lighting in Zhongshan, China, including wall lights, bedside reading lights and bespoke ceiling fittings, with custom work since 2013. Because the low end only shows itself in the finished room, custom orders begin with a single-piece approval sample and a 25 to 35 day production window. Learn more at zerounolighting.com.

About the author

Sonny Yu is Sales Manager at Zerouno Lighting in Zhongshan, working with hotel owners, designers and procurement teams. He writes about the details that decide how a property lives with a fixture: dimming behaviour, serviceability, and the documents that outlast the opening date.

2026年10月16日星期五

LED Driver for Hotel Lighting: Specifying the Hidden Part

An LED driver is the small module that turns mains supply into the current a light-emitting diode can use. In a decorative hotel fixture it also decides whether the fitting dims cleanly, how warm it runs inside a closed body, and whether a failure is a five-minute swap or a ceiling repair. It never appears in a rendering, and it is almost always the first component a hotel replaces.

This guide is for the designer writing the fixture schedule, the team comparing quotations for the same sconce, and the maintenance lead who will hold the spares for the next decade.

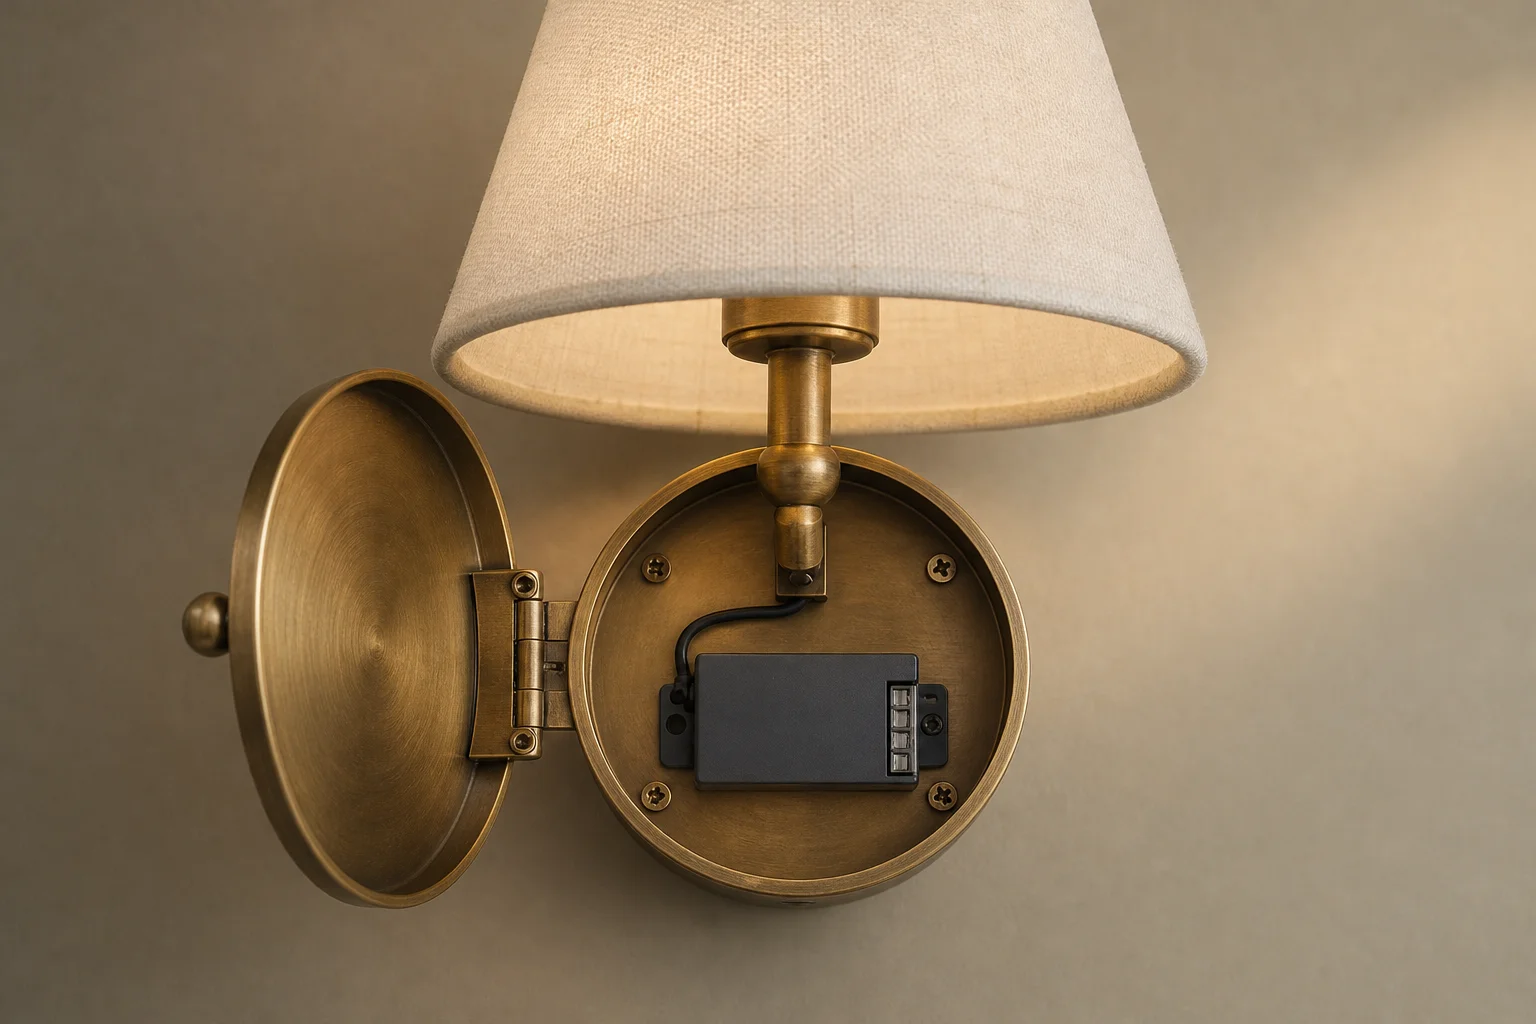
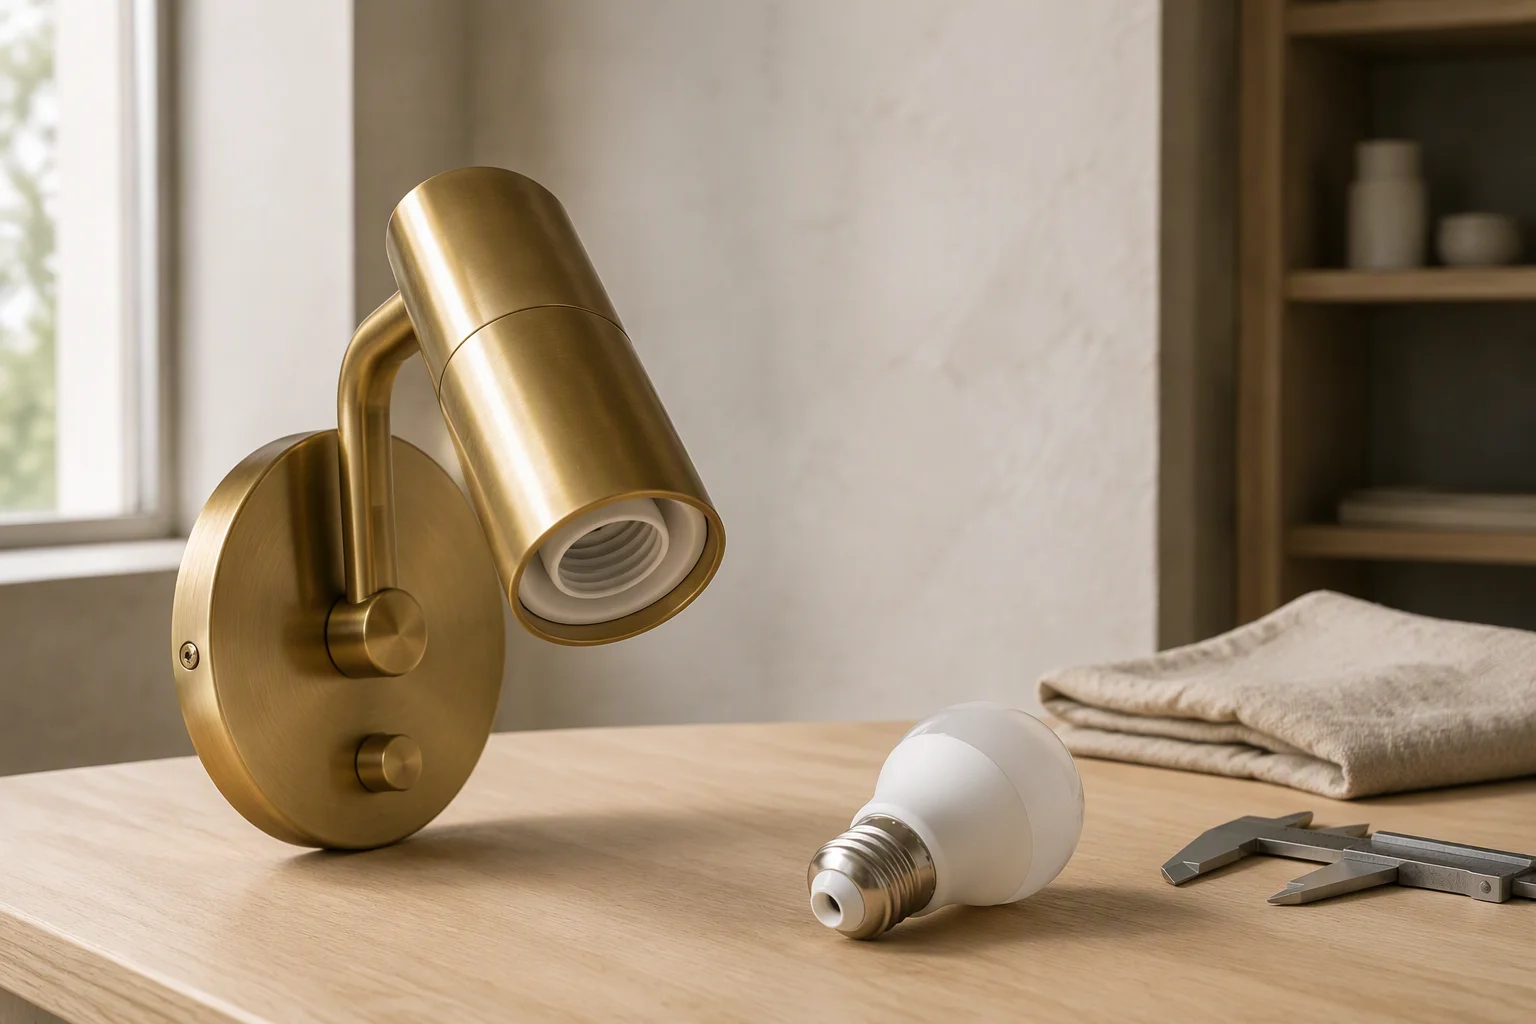
A wall light opened from the room side to show the driver module and its connector inside the body
The part nobody draws: a driver mounted inside a closed decorative body settles both how the fitting dims and how it is serviced.

Where the driver sits inside a decorative fixture

Drivers are not one product with one home. Two arrangements cover most decorative work, and the shape of the fitting usually decides which.

A remote driver sits outside the fitting, in the ceiling void, a wall box or an accessible enclosure. Maintenance teams prefer it: the part is reached without touching the decorative object, and one part number can serve several fittings.

An integral driver sits inside the fixture, in the backplate, the base of a table lamp or the collar behind a shade. On decorative work this is the common case, because there is nowhere else to put it and the design does not want a visible box. It is reached only when the fixture is opened, and its working conditions are set by an internal volume chosen for how it looks.

Why a sealed decorative body changes the thermal picture

Decorative fixtures are often deliberately closed: a fabric shade over a diffuser, a sealed brass tube, a stone or alabaster shade on a metal collar. Those are choices about appearance, dust and ingress. They also change the temperature the driver sees, because a closed volume has no airflow to carry heat away.

A driver carries a rated ambient and case temperature, and its life falls as temperature rises. Inside a closed body it is warmed by its own losses, the LED board, the lamp and the surrounding metal or stone. How much leaves depends on how it is mounted, whether there is any opening, and how much surface area the body presents to the room.

Surface warmth is worth reading carefully rather than treating as a fault. A brass tube that feels warm low on the run is usually conducting heat outward, which is the body doing its job. The useful question is what conditions the driver was rated for and what the fitting gives it. A fitting bound for a warm climate may need a higher-rated part or a remote arrangement.

What decides whether a driver can be replaced

Two drivers with the same nominal output can differ completely in how they are removed. Three facts settle it, and all three belong in the order paperwork.

  • Connectorised or hard-wired. A driver that ends in a plug and socket is a swap. One potted or wired into the fitting is a rebuild unless the whole module comes out.
  • Reached from which side. A driver behind a removable backplate is reachable from the room. One sealed above a closed ceiling turns a short job into a ceiling repair.
  • Still supplied. A reference current at handover may not be in three years. Ask what replaces it if the original is discontinued.

A replacement also rarely matches the original in length, width and height, so record the available internal envelope while the drawing is still open.

Spares: what the hotel will re-order

On a phased rollout, the part that has to stay orderable for a decade is rarely the fixture. It is the driver.

The protection is a driver schedule that travels with the project rather than the supplier: one line per fitting type, carrying the driver reference, whether it is integral or remote, and the fitting it serves. Keep it in the handover pack. When a rollout runs across phases, split the spare list the same way as the order, so a later phase is not hunting a part that was only specified for the first one.

Low-end dimming: where drivers differ most

Two drivers sold as dimmable from the same nominal output can behave very differently in the bottom of their travel. One holds a stable low level; one steps; one flickers below a threshold; one cuts out, so the last part of the dimmer's rotation does nothing. That behaviour belongs to the driver and is not visible on a datasheet summary.

Mains dimming adds a second variable, because dimmer and driver have to suit each other and a lightly loaded circuit may behave differently from a fully loaded one. Analog and addressable interfaces remove the load question but introduce polarity, wiring, and who commissions the result.

None of this shows up until the room is furnished and someone turns the dial down at night. A fade from full to minimum on one sample of the intended fitting, at the intended interface, is the cheapest test in the package.

What the submittal has to state

An electrical submittal for decorative lighting is short. Every line exists because a question was once asked too late.

ItemWhy it is asked for
Driver referenceLets the hotel re-order the exact part, not a lookalike
Integral or remote, and whereDecides how the fitting is opened, and from which side
Connectorised or hard-wiredSeparates a swap from a rebuild
Rated conditions, and the fitting's ownShows whether a closed body was accounted for
Dimming method and low-end behaviourSettles what the guest will experience
Available internal envelopeAdmits a substitute replacement later
Spare reference per fitting typeKeeps a phased project serviceable

One caution about documents: a declaration covering a driver family is not a statement about the unit you are buying, because the family may exist in several variants.

The driver checklist before the order

  • Confirm where the driver sits, and how the fitting is opened to reach it.
  • Ask what conditions the fitting creates inside, sealed body included.
  • Record whether the driver is a module on a connector or wired in.
  • Measure the internal envelope available for a future replacement.
  • Test a fade from full to minimum on the intended interface.
  • Write the driver reference and the spare reference into the schedule.
A decorative fixture is chosen on what you can see and maintained on what you cannot. The driver is the part the hotel will meet first.

FAQ

What does an LED driver actually do?

It converts the mains supply into the regulated current the light source needs. It is not an accessory bolted onto a light: it defines the LED's operating conditions, and therefore its output and its behaviour when dimmed.

Can a driver be replaced with a different brand?

Often, if the electrical characteristics, dimensions, mounting and dimming interface all match and the fitting has room. The original reference stays safest: parts that look equivalent on paper can differ in low-end behaviour and rated temperature.

Why does a fitting feel warm near the backplate?

Because the driver and the light source put heat into a closed volume and the body conducts it outward. Some surface warmth is normal; the question worth asking is what the driver was rated for and what the fitting provides.

Do sealed fixtures need a different driver?

They need the driver's rated conditions checked against the closed volume rather than the room. That may point to a higher-rated part, a remote arrangement or a larger internal space, and it is easiest to settle while the drawing is open.

How should spare drivers be chosen?

By fitting type rather than by number of rooms. The supplier's job is to keep the current reference available and to say what replaces it if discontinued; the quantity held is a maintenance policy decision.

The takeaway

The LED driver is the least visible and most serviceable part of a decorative fixture, and usually the first to fail. Its behaviour is settled long before anyone notices it: by where it sits in the body, whether that body is closed, whether it can be reached and unplugged, and how it behaves at the bottom of the dimmer. None of those decisions cost much at drawing stage, and all of them are expensive afterwards.

Ask where the driver lives, what conditions the fitting creates, how it is replaced and from which side, and ask for the reference in writing.

Zerouno Lighting (ZeroUNO) manufactures hospitality decorative lighting in Zhongshan, China, including wall lights, bedside reading lights and ceiling fittings, and has built project and custom fixtures since 2013. Because decorative bodies are often deliberately closed, custom work starts from a single-piece approval sample, so the driver arrangement is settled while the drawing can still change. Learn more at zerounolighting.com.

About the author

Sonny Yu is Sales Manager at Zerouno Lighting in Zhongshan, working with hotel owners, designers and procurement teams on bespoke decorative lighting. He writes about the parts of a fixture that never appear in a rendering but decide what a property lives with for the next decade.

2026年10月15日星期四

Hotel Corridor Downlights: Flush Mount vs Recessed

A hotel corridor rarely gets a second chance at its ceiling. Once the plasterboard is closed, the fixture positions, the cut-outs and the depth above them are fixed, and the choice between a recessed downlight and a surface-mounted flush fitting becomes a construction fact. Both can deliver a similar quantity of light and leave the project with very different obligations.

This guide is for the people who settle that choice before the ceiling closes: the designer issuing the fixture schedule, the procurement team pricing the package, and the contractor setting out on site. It covers what each type commits you to, how the ceiling and the void above it decide the answer, how each is serviced, and where the coordination cost lands.

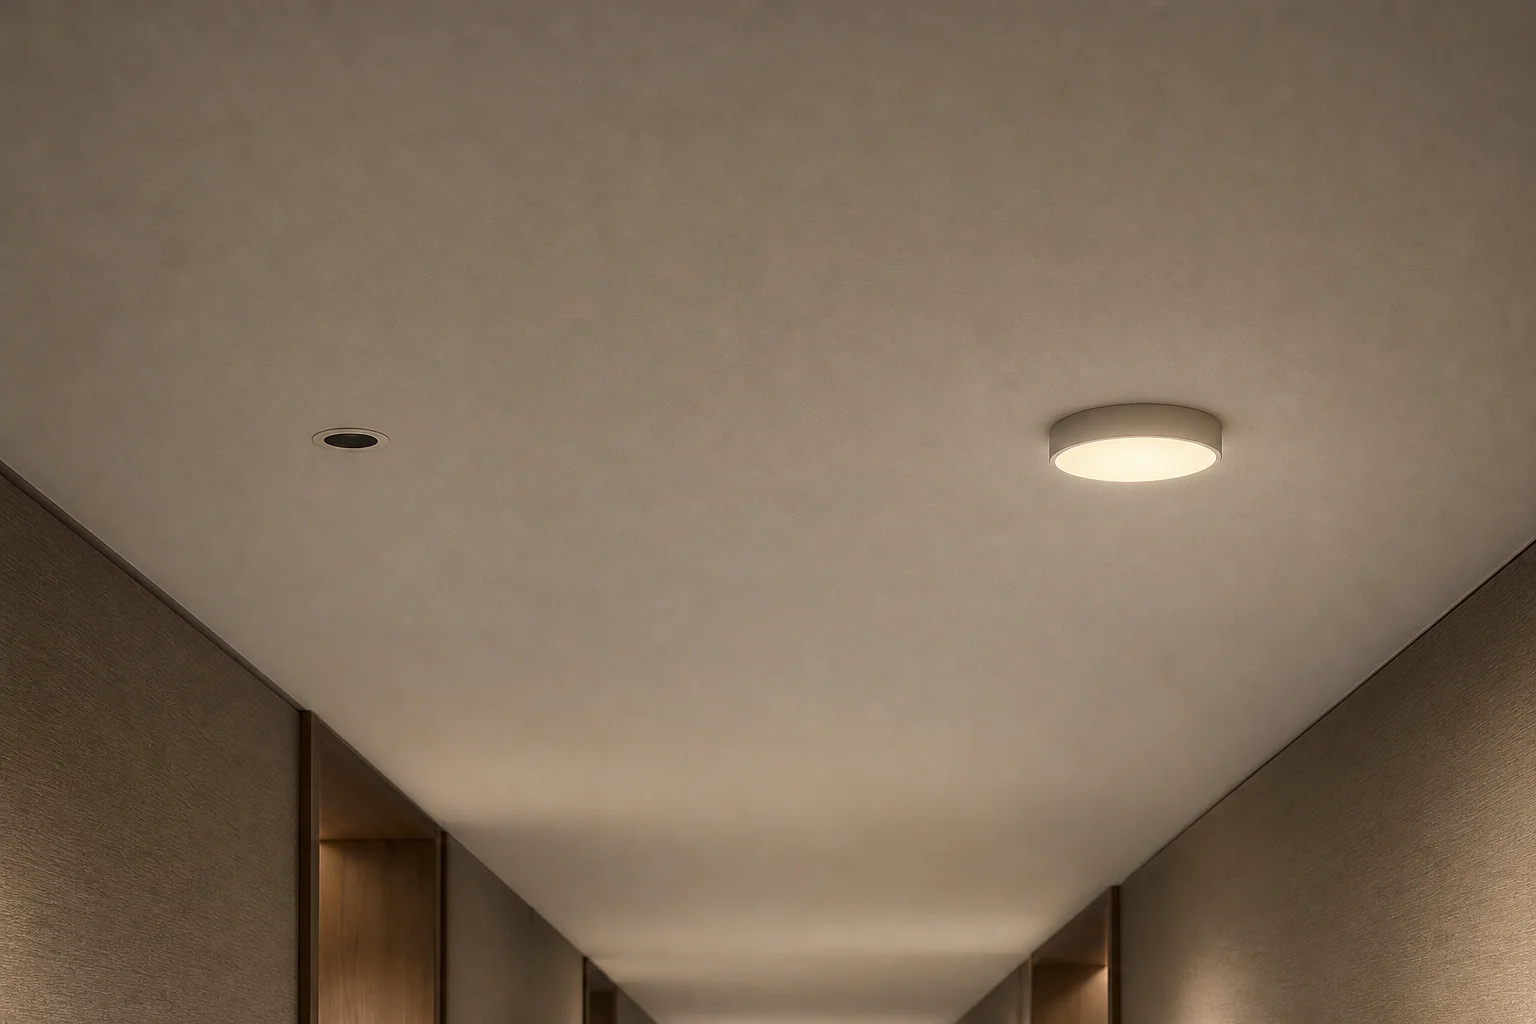
Hotel corridor ceiling showing a recessed downlight and a shallow surface-mounted flush light side by side
The same ceiling, two commitments: a recessed aperture that hides the source above the plane, and a shallow flush body that stays below it.

Two ways to light the same corridor

The two families are separated by one question: does the light source sit behind the ceiling plane, or in front of it? A recessed downlight is set into the ceiling, leaving only the aperture visible, with the body, driver and wiring in the void above. A surface-mounted flush fitting is fixed to the ceiling face; its shallow body stays in the room, and the ceiling is never opened.

Neither is better in the abstract: the ceiling build-up, the services running through it and the way it will be maintained decide which belongs in the schedule. A decision made on appearance alone is the one reversed on site.

Aperture, cut-out and the ceiling line

What the guest sees is a ceiling, not a fixture, so the first thing each option changes is the ceiling line.

A recessed downlight removes material. The visible result is an aperture, whose size and trim set how prominent it reads. A flanged trim leaves a thin ring on the plaster face; a trimless detail must be set and filled by the ceiling trade, making it a joint finish rather than a fitting detail.

A flush mount adds material. A row of shallow bodies reads as a datum along the ceiling plane. On a ceiling with a continuous shadow gap or a long recessed detail, a projecting body interrupts the line; on a plain ceiling it is the only articulation. The test is simple: lay both options over the ceiling drawing and ask which one the ceiling detail was written for.

What a recessed downlight commits you to

Recessing a fitting is a commitment to the space above it, and on a hotel corridor that space is rarely empty.

A cut-out has to be made, which means a position, a diameter and a tolerance agreed before the ceiling closes. In plasterboard that is routine; in a concrete soffit it is a void requirement carried on the structural drawings, and a late change is a drill hole rather than an eraser.

The fitting also needs somewhere to live: body depth and driver occupy the plenum, the same zone as the ductwork, sprinkler mains, cable trays and a structural beam. A shallow ceiling can rule the fixture out at drawing stage even when the photometric case is strong.

  • Confirm the void depth at every position, not just the first one.
  • Check the cut-out against the ceiling type, including any fire or acoustic rating.
  • Decide who marks and cuts the ceiling, and at what point in the programme.
  • Agree the setting-out tolerance in writing before the first hole is made.

None of this is difficult while the ceiling is open. All of it becomes a site instruction once closed.

Maintenance access over the life of the corridor

A corridor fixture is serviced in the most awkward conditions in the building: a narrow space, under time pressure, sometimes from a ladder.

A recessed downlight is normally serviced from below: the lamp or module is released through the aperture, and the driver is reached through the same opening or from an accessible enclosure nearby. That works provided the design has been honest about which side each part is reached from; a driver sealed above a closed ceiling turns a five-minute job into a ceiling repair.

A flush mount is serviced as a whole. The body comes off the ceiling face and everything inside travels with it, which makes the service path easy to hand to a maintenance team. Either way, the schedule should say which part is replaceable and from which side, while the order is still open.

Beam control along a long corridor run

On a long run, the difference between the two options is mostly optical.

A recessed downlight takes an optic, and the optic decides distribution. A narrow beam can graze a wall or throw a defined pool on the floor, and an adjustable version can be aimed after installation; the reflector controls the cut-off.

A flush mount generally has a broad, fixed distribution. It fills a space evenly, with little ability to place light on one surface rather than another. Where the design depends on a defined pool or a wall wash, that problem belongs to the optic. The trade-off is control against evenness: a scheme carried by the distribution of light points to the recessed aperture, while one carried by the surfaces on either side suits the flush mount.

Comparing the two, line by line

The table below is a coordination checklist rather than a ranking: a well-detailed flush mount will serve a corridor better than a badly coordinated recessed light, and the reverse is equally true.

What it decidesRecessed downlightSurface flush mountWhat to pin down
Ceiling openingA cut-out is requiredNo opening; fixed to the faceCut-out diameter, tolerance and who marks it
Depth above the ceilingBody and driver need plenum depthNothing needed aboveThe void available at every position
Ceiling lineOnly the aperture stays visibleA shallow body sits in the planeWhich one the ceiling detail was drawn for
ServicingFrom below, through the apertureThe whole body comes offWhich part is replaceable and from which side
Beam controlOptic and aperture set the distributionBroad and fixedWhether the scheme needs a defined pool or wash
Coordination ownerCeiling trade plus the MEP layoutElectrical onlyWho confirms each position, and when

Checking the decision against the corridor

Before the fixture type is fixed in the schedule, run the corridor past the checklist below.

  • Measure the void at each position, including the shallowest point of the run.
  • Confirm whether the ceiling is interrupted by beams, ducts or sprinkler mains.
  • Decide how each position is reached for service, and from which side.
  • Match the optic to the run rather than to a catalogue default.
  • Record the cut-out size and its tolerance in the schedule, not on a site sketch.
  • Agree the mock-up position early, when moving a fixture costs nothing.
A recessed downlight is a decision about what is above the ceiling. A flush mount is a decision about what is below it. Get the pair the wrong way round and the mistake stays invisible until the first service visit.

FAQ

Do hotel corridors always use recessed downlights?

No. Recessed fittings suit ceilings with depth where the source should be hidden, but corridors with shallow or solid ceilings often work better with surface fittings.

Can a flush mount replace a recessed downlight later?

Often yes, if a supply and a fixing point exist at the same position. The ceiling will show the old aperture unless it is repaired, and the distribution changes, so it is a lighting change as well as a hardware change.

How much depth does a recessed downlight need above the ceiling?

It varies with the fitting and the driver arrangement, which is why the schedule should carry a required void depth rather than an assumed one: the number is the manufacturer's to state and the designer's to check.

Which option is easier to maintain?

The flush mount, in most corridors, because the whole body is reached from the room side. A recessed downlight can be just as serviceable when driver access has been designed deliberately, and much harder when it has not.

What belongs in the fixture schedule either way?

The fixture type, its cut-out or fixing detail, the required void depth where relevant, the optic, and the servicing route, plus the setting-out tolerance and the person responsible for each position.

The takeaway

The choice between a recessed downlight and a flush mount in a hotel corridor is settled by the ceiling, not by the catalogue. Recessed fittings hide the source and buy beam control, charging for it in cut-outs, void depth and coordination; surface fittings leave the ceiling intact and keep servicing simple, giving up most of the optical control in exchange.

Decide the ceiling construction and the service route before the schedule is issued, and record the cut-out, the void depth and the servicing side. On a corridor, the fixture that looks right and fits nothing is the most expensive option available.

Zerouno Lighting (ZeroUNO) manufactures hospitality decorative lighting in Zhongshan, China, including wall lights, bedside reading lights and ceiling fittings for hotel projects. Custom work starts from a single-piece approval sample, and every order carries a two-year warranty with a 48-hour response on service questions. Learn more at zerounolighting.com.

About the author

Sonny Yu is Sales Manager at Zerouno Lighting in Zhongshan, working with hotel owners, designers and procurement teams on bespoke decorative lighting. He writes about the drawing-stage decisions that are cheap on paper and expensive once the ceiling has closed.

2026年10月14日星期三

Hotel Lighting Manufacturer vs Wholesaler: What Changes

Most hotel lighting packages are bought through a commercial chain rather than from the entity that builds the goods. The name on the quotation may be the factory that cuts and wires the metal, or a trading house that places the order elsewhere. Both arrangements are legitimate. What differs is where control sits, and that shows up in four places: the drawing, the approval sample, the change raised after the order, and the spare part the hotel re-orders years later.

This guide is for the people who settle those differences before the purchase order goes out: the designer issuing the specification, the procurement team comparing two quotations for the same fitting, and the owner's representative who signs the handover. It sets out what changes across the chain, and the questions worth asking while the answer can still change the order.

Brass hotel wall sconce in mid-assembly on a lighting workshop bench with a rolled drawing
The commercial chain decides how many hands a fixture passes through between the approved sample and the spare part the hotel re-orders.

Two businesses can sit behind one quotation

A maker owns the fixture engineering. The shop drawing, the holder type, the driver pocket, the backplate hole positions and the finish process sit inside one organisation that also runs the line. A reseller sells the same delivered object but does not hold that engineering; it holds a relationship with whoever does.

The distinction matters less at purchase than when something has to change. Specifications move, and where a question the drawing did not answer lands decides how long the answer takes. It also decides who is accountable.

Who owns the drawing

The shop drawing is the interface between design intent and metal. It fixes the mounting centre, the cable exit, dimmer compatibility and the tolerance on a custom dimension. Ask who will hold it and who will sign it.

With a maker, a revision is judged against tooling that already exists, and the answer reflects what the workshop can physically do. With a reseller, the revision is forwarded, and the answer depends on the queue at the other end. Neither route is wrong, but their response times diverge in the last three weeks before delivery, which is exactly when specifications move.

Two lines belong in the order: name the entity that holds the shop drawing, and state the route a technical query takes with the turnaround expected on it. That second line is what keeps a four-day question from becoming a week.

Who carries the approval sample

The approval sample is where the project is really decided, because it is what the design team signs against. A sample built on a prototype bench proves the design can exist; it does not prove the production line can repeat it.

With a maker, the sample normally comes off the line and tooling that will run the order, so its record is short: the drawing revision, the finish used and the approved photographs. With a reseller the sample is commissioned, so the questions change. Which line built it, and will that line run the order? If the second answer is uncertain, the sample has told you less than it appears to. Custom work in our own workshop begins with a single-piece approval sample for this reason: there is one object everyone has agreed on.

Keep the physical evidence either way: photographs, the finish reference and the drawing revision the sample was signed against are what settle an argument in month nine of a rollout.

What changes across the chain

The table below is a checklist of things to pin down rather than a ranking, because a reseller with a long-standing factory relationship can outperform a maker on one package, and the reverse is equally true.

AspectMakersResellersWhat to pin down in writing
Drawing ownershipHeld in houseForwarded to the building factoryName the entity that holds and signs it
Technical queriesAnswered where the fixture is builtRouted through an intermediaryState the query route and expected turnaround
Approval sampleBuilt on the production lineCommissioned from a factoryConfirm which line built it and will run the order
Mid-project changeFeasibility judged at the toolingJudged one hop awayFix who confirms a change, and by when
Service partsTo the original specificationDepend on the factory still supplyingRecord every replaceable part reference
Phased matchingMatched to an earlier phase on requestMatched only if the same factory is used againCarry the finish and colour reference on the order

Where a variation is absorbed

A variation raised after the order is not only a pricing event. It is a translation event, and each hop costs context as well as time: the reasoning behind the change thins as it travels, and a factory that receives a bare change note can implement it literally and still miss the point.

The control is a single written change note with one owner, stating what is changing, why, the date the answer is needed and the consequence of a refusal. The reply should carry three things: whether it is feasible, what it does to the delivery date, and what it does to anything already approved.

Spares continuity over a phased handover

Large projects rarely arrive in one drop. Floor-by-floor releases, separate towers and staged refurbishments all mean a later phase has to match an earlier one, and the matching problem worsens whenever the commercial chain changes between phases. A second phase awarded to a different reseller is the classic case: the fixtures can be specified identically and still arrive one shade away.

What protects a phased project is a reference list that travels with the order rather than with the company: holder and base type, finish and its process route, the colour appearance and rendering of the approved lamp, and a physical sample held on site. A colour is easier to match against an object than against a description.

The service question sits alongside it: a fixture may be serviceable by replacing a lamp, or sealed with the driver as its only replaceable part. Either way the hotel needs to know what it will re-buy and from whom, and that is easier to obtain while the order is open.

Questions that separate a maker from a reseller

Run these before the order is placed; a reseller can answer them well, and a weak link becomes visible early.

  • Which entity holds and signs the shop drawing, and who signs the revision the line works to?
  • Which line builds the approval sample, and is it the line that will run the order?
  • Who answers a technical query during production, and with what turnaround?
  • Who confirms feasibility, cost and schedule impact for a change raised after the order?
  • Which parts will the hotel re-order later, and against what reference?
  • Who signs the documents that travel with the goods, and where does inspection happen?
  • If a later phase must match this one, what finish and colour reference is kept, and where?
The quotation tells you what the fixture costs. The chain behind it tells you what a change will cost, and whether the tenth phase will still match the first.

FAQ

Is a reseller always more expensive?

Not predictably. The difference is rarely a simple markup, and a reseller may hold better factory terms than a small buyer can reach alone. What reliably differs is how many hops separate the question from the person who can answer it.

Can a reseller deliver exactly the same fixture?

Often yes, particularly when the same factory builds both routes. The exposure is traceability rather than capability: if the factory changes, the next batch can differ while the specification reads identically.

How do I find out who actually makes the fixture?

Ask in writing before the order: which entity holds the shop drawing, which line built the approval sample, and which line will run the order. Then check that the paperwork and the inspection point match those answers.

Does buying from a maker remove the risk?

No. Capacity, scheduling and communication decide the outcome, and a maker with a full order book can miss a date as easily as anyone else. What changes is the number of translations a technical question passes through, and who is accountable for it.

What is the single most useful line to add to an order?

Name the entity that holds the drawing and the spare-part reference, and state who answers a technical query. One sentence fixes the two things that cause the most trouble later.

The takeaway

Comparing a maker with a reseller is not a search for the honest option; it is a question about where control sits. Put drawing ownership, the sample's build line, the change route and the spare-part reference into the order document, and the chain stops being a hidden variable. Where a project is delivered in phases, treat the finish and colour reference as an asset of the project rather than of the supplier, and keep a physical sample on site.

Zerouno Lighting (ZeroUNO) manufactures hospitality decorative lighting in Zhongshan, China, including wall lights, bedside reading lights and alabaster-bodied pieces for hotel projects. Custom work starts from a single-piece approval sample, and every order carries a two-year warranty with a 48-hour response on service questions. Learn more at zerounolighting.com.

About the author

Sonny Yu is Sales Manager at Zerouno Lighting in Zhongshan, working with hotel owners, designers and procurement teams on bespoke decorative lighting. He writes about the commercial decisions that are cheap to settle on paper and expensive to settle on a delivered crate.

2026年10月13日星期二

E27 vs E26 vs B22: Choosing Lamp Bases for Hotel Projects

A hotel can re-carpet a corridor, re-hang its art and replace every headboard without touching the electrical installation. Change the lamp base and the property's whole spare-lamp routine changes with it. The base is the small metal interface at the foot of the lamp, and it quietly decides which bulb the hotel can buy locally for the next decade.

This guide is for the people who settle that detail on paper: the designer writing the fixture schedule, the procurement team comparing two quotations for the same fitting, and the owner's representative signing off a rollout that spans more than one country. It covers what E27, E26 and B22 actually mean, where the differences bite, and how to lock the choice before the metalwork is cut.

Brass bedside wall lamp beside a screw-base LED lamp, comparing lamp base types on a specification bench
The holder is built once and the lamp is replaced many times, so the base must suit the market that will buy the spare.

The lamp base is a purchasing decision, not a design detail

Most fixture schedules describe the base in three careless words: standard screw. That phrase hides a regional decision with a long tail, because a hotel does not buy its replacement lamps from the supplier that built the fitting. It buys them from whichever local wholesaler stocks the lamps that market uses, usually years later, by someone reading a label in a maintenance cupboard.

The base therefore belongs to the market where the property stands, not to the mood board the room was designed from. Where the two disagree, every routine lamp change becomes a special order. The holder is also a mechanical part fixed while the fitting is built, so once the metalwork is committed a change of base is not an amendment to a drawing but a new component and a new approval sample.

What the base code tells you at a glance

The naming convention carries more information than it looks. E marks an Edison screw cap and B marks a bayonet cap; the number beside it is the nominal diameter in millimetres. An E27 lamp screws into a 27 mm holder, an E26 into a 26 mm holder, and a B22 pushes and twists into a 22 mm bayonet.

The code is mechanical rather than electrical, so two lamps that fit the same holder can still be quite different products, and one millimetre matters more than it sounds once both families sit side by side.

BaseCap typeNominal sizeMarket conventionWhat it means for spares
E27Edison screw27 mmWidely used across Europe and AsiaBroadest choice of local LED lamps
E26Edison screw26 mmStandard in North AmericaSpares tie to one regional supply chain
E14Small Edison screw14 mmDecorative and small table lampsFewer output choices; fix the reference
B22Bayonet22 mmTraditional in the UK and several other marketsNo cross-compatibility with screw caps
B15Small bayonet15 mmSmall decorative fittingsNarrower local stock; keep a sample

Why E26 and E27 are not interchangeable in practice

An E26 lamp and an E27 lamp look like the same object. The difference is a single millimetre of thread diameter, and that millimetre is enough to make two caps that should not be treated as one.

In a sample room the mismatch is easy to miss, because a lamp can often be persuaded into the wrong holder far enough to light. In service it appears as intermittent contact or a cap cross-threaded by a housekeeper, neither of which looks like a specification error. The practical rule is a single one: one base convention per property, written down and carried through the schedule, the approved lamp and the spare-lamp stock.

Bayonet markets change the whole spare-lamp story

A bayonet cap is not a screw cap with a different measurement. It is a different mechanical system: two pins, a push and a quarter turn. Nothing about it is compatible with an Edison screw, so a bayonet property and a screw-cap property cannot share a spare-lamp cupboard however similar the fittings look.

For a multi-property rollout this is a commercial fact rather than a technical footnote. Two markets on different caps mean two holder variants on the order, two approved lamp references for the maintenance manual and two lines in the quotation. Raised while the drawings are open it costs a line item; raised after delivery it costs a rework programme.

Integrated LED removes the base and moves the risk

Not every decorative fixture in a hotel has a user-replaceable lamp. A growing share of wall lights, linear details and small downlights are integrated LED, sealed at the factory with no cap at all. That removes the base question, and it also removes the lamp as the thing that fails first.

The trade-off is worth stating plainly. An integrated fitting cannot be repaired by swapping a lamp, so the service part becomes the fitting itself or its driver, and both depend on the supplier still being able to provide a match. The questions to settle are the ones a hotel can act on years later: is the driver reachable from the room side, is there a documented replacement path, and does the warranty cover the complete assembly rather than the light source alone.

Spare-lamp discipline across a multi-country portfolio

Once the base is fixed, the next failure is usually a colour mismatch. Two lamps can share a base, a shape and a nominal rating and still look different at low output, because colour appearance and colour rendering vary between products and between production runs. A replacement that satisfies the electrical description but not the appearance of its neighbours will be noticed by guests long before it is noticed in a maintenance log.

The fix is record-keeping rather than hardware. The spare-lamp record for each property should carry the base, the colour appearance and the colour rendering of the approved lamp, plus a physical sample kept on site, because colours are easier to match against an object than against a description.

Fix the base on the drawing, then write it into the specification

The base is settled when the holder is chosen, well before the mock-up room, and everything afterwards is more expensive. The specification is where the decision has to be visible.

  • State the base in the fixture schedule for every item, in code form, and delete the phrase standard screw.
  • Record the market each base was chosen for, so a later reader sees the reasoning rather than guessing.
  • Name an approved lamp reference covering the base, colour appearance and colour rendering.
  • Confirm the holder takes the exact lamp the property intends to buy locally, not a near equivalent.
  • Keep one base convention per property, and split the schedule where a portfolio crosses screw and bayonet markets.
  • Ask the supplier to show the holder type on the submittal drawing, not only the fitting's family name.
The base is the one part of a hotel fixture the hotel will re-buy without you. Specify it for the market that has to maintain it, not for the market that happened to supply it.

FAQ

Is E26 the same as E27?

No. Both are Edison screw caps, but the nominal diameters differ by one millimetre. They are separate standards, and a lamp built to one should not be relied on in a holder built to the other.

Can a hotel run E27 lamps in an E26 holder?

It can appear to work in a sample room and then behave badly in service. Intermittent contact and cross-threaded caps are the usual outcomes.

Which base should a UK property use?

Bayonet caps are the traditional domestic convention in the UK and several other markets, though screw caps are also widely stocked. What matters is choosing once per property and carrying it through to the spare-lamp list.

Does the base decide which lamp a fixture can use?

Only the mechanical fit. The lamp also has to suit the installation electrically and the fixture optically, so the base is the first filter rather than the whole answer.

Can the base be changed after the sample is approved?

It becomes a new holder, a new approval sample and a fresh block of production time. Change it while the drawings are open, not after the mock-up is signed.

The takeaway

Treat the lamp base as part of the commercial specification rather than a footnote on the drawing. Fix one convention per property, write the base into the fixture schedule in code form, and name the exact lamp the hotel can buy locally ten years from now. Where a portfolio crosses bayonet and screw markets, expect two holder variants and two spare-lamp lines, and put that in the quotation while it is still cheap to change.

Zerouno Lighting (ZeroUNO) builds hospitality decorative lighting in Zhongshan, China, from bedside reading lights and wall-mounted pieces to alabaster-bodied fittings for hotel projects. Holder type and approved lamp reference are settled before production starts, with custom work beginning at a single-piece approval sample and a bespoke order typically running 25 to 35 days. Learn more at zerounolighting.com.

About the author

Sonny Yu is Sales Manager at Zerouno Lighting in Zhongshan, working with hotel owners, designers and procurement teams on bespoke decorative lighting. His writing follows a specification from the schedule through to the maintenance cupboard, on the principle that small mechanical decisions decide how a project behaves in service.

Modular Chandelier Assembly: Site-Proof Part Numbering

A modular chandelier rarely fails on site because the fixture is wrong. It fails because the crate, the drawing and the ceiling stop agreein...