显示标签为“Guest Experience”的博文。显示所有博文

2026年10月17日星期六

Hotel Lighting for Sleep: Dimming Through the Night

A hotel room is designed in daylight and judged in the dark. Sample boards are reviewed beside a window at two in the afternoon; the room guests remember is the one they meet at three in the morning, half asleep, trying not to wake the person beside them.

This follows one night in a guest room and sets out what has to be decided, tested and handed over. It is written for the operator signing off a mock-up, the designer writing the control intent, and the buyer wondering why phase three differs from phase one.
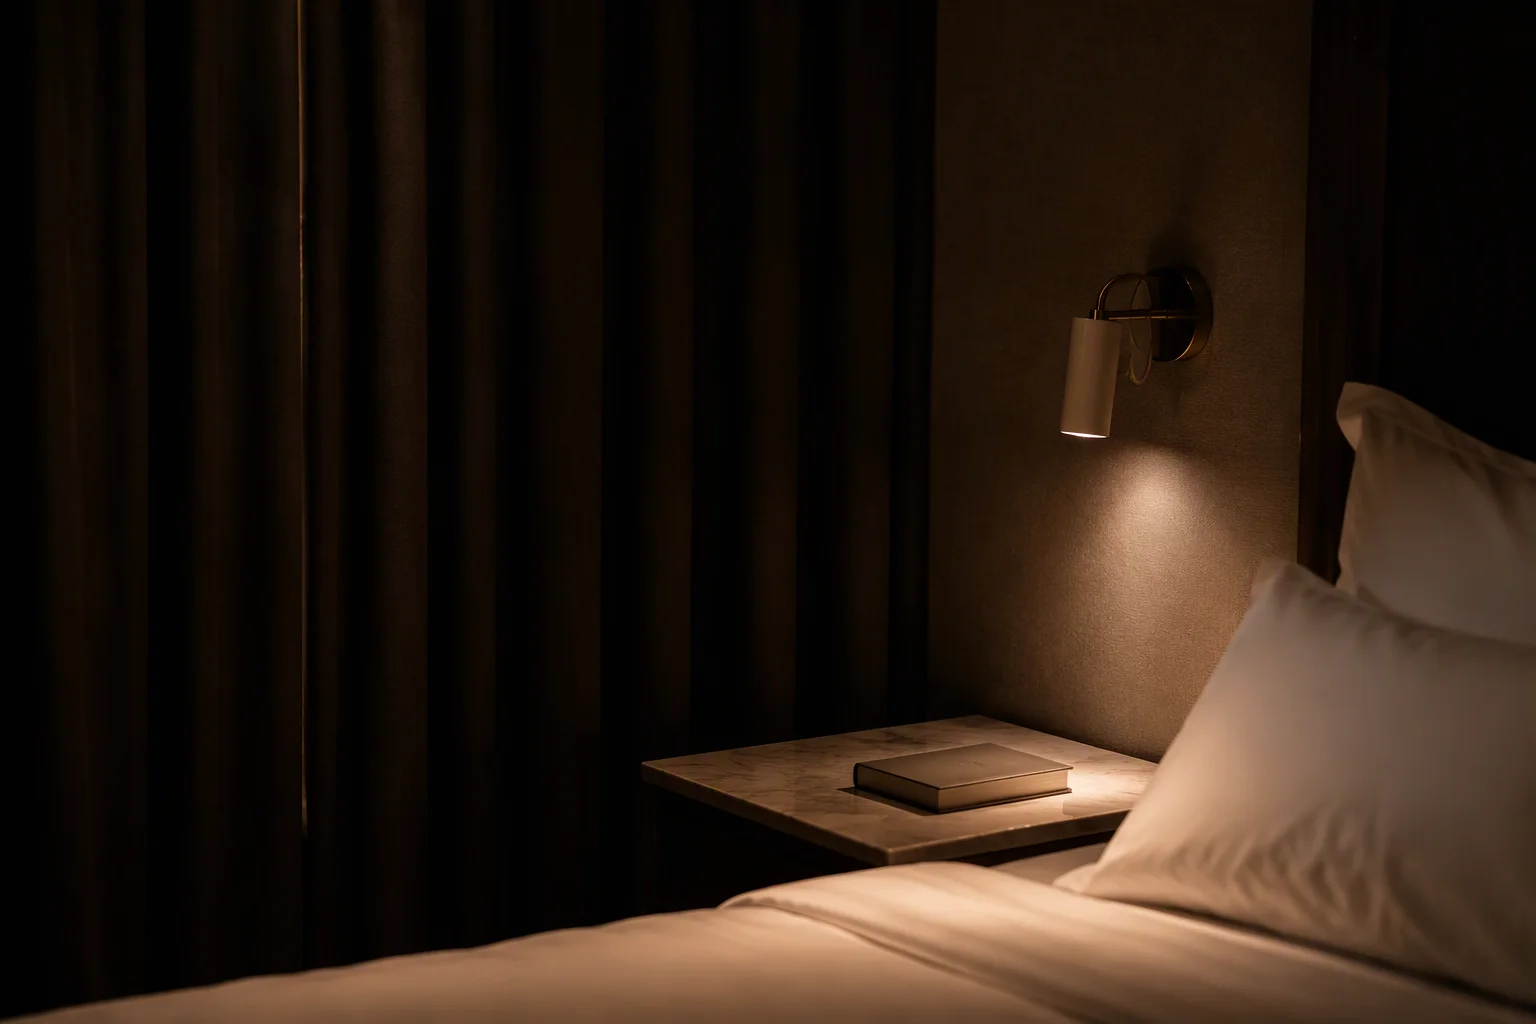
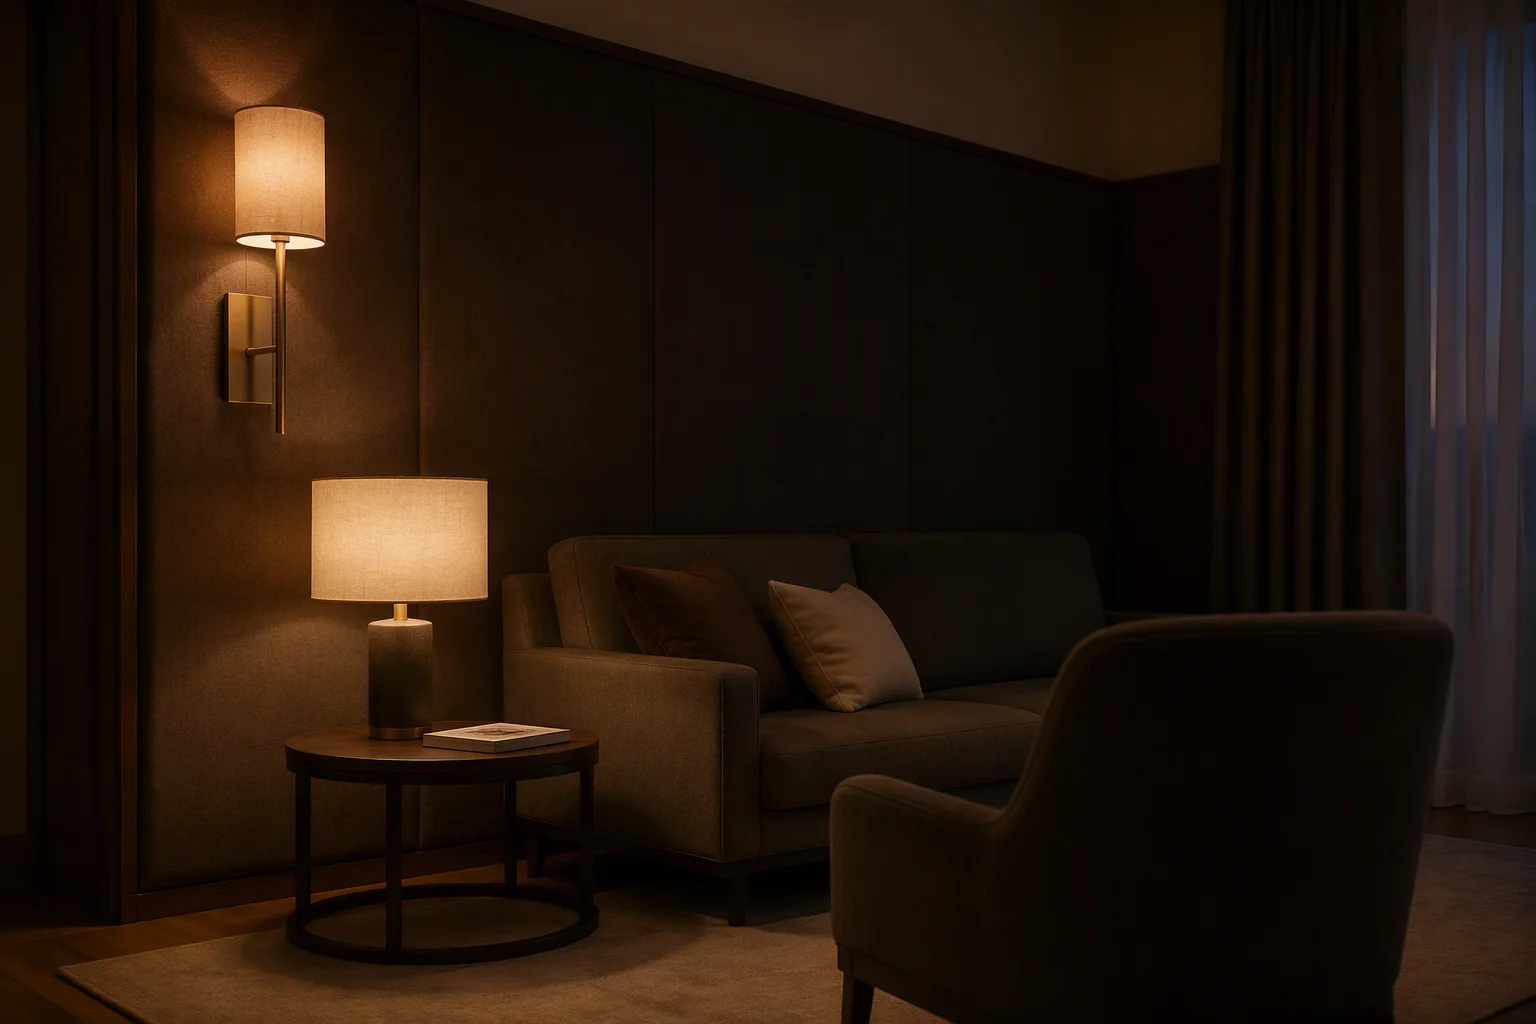
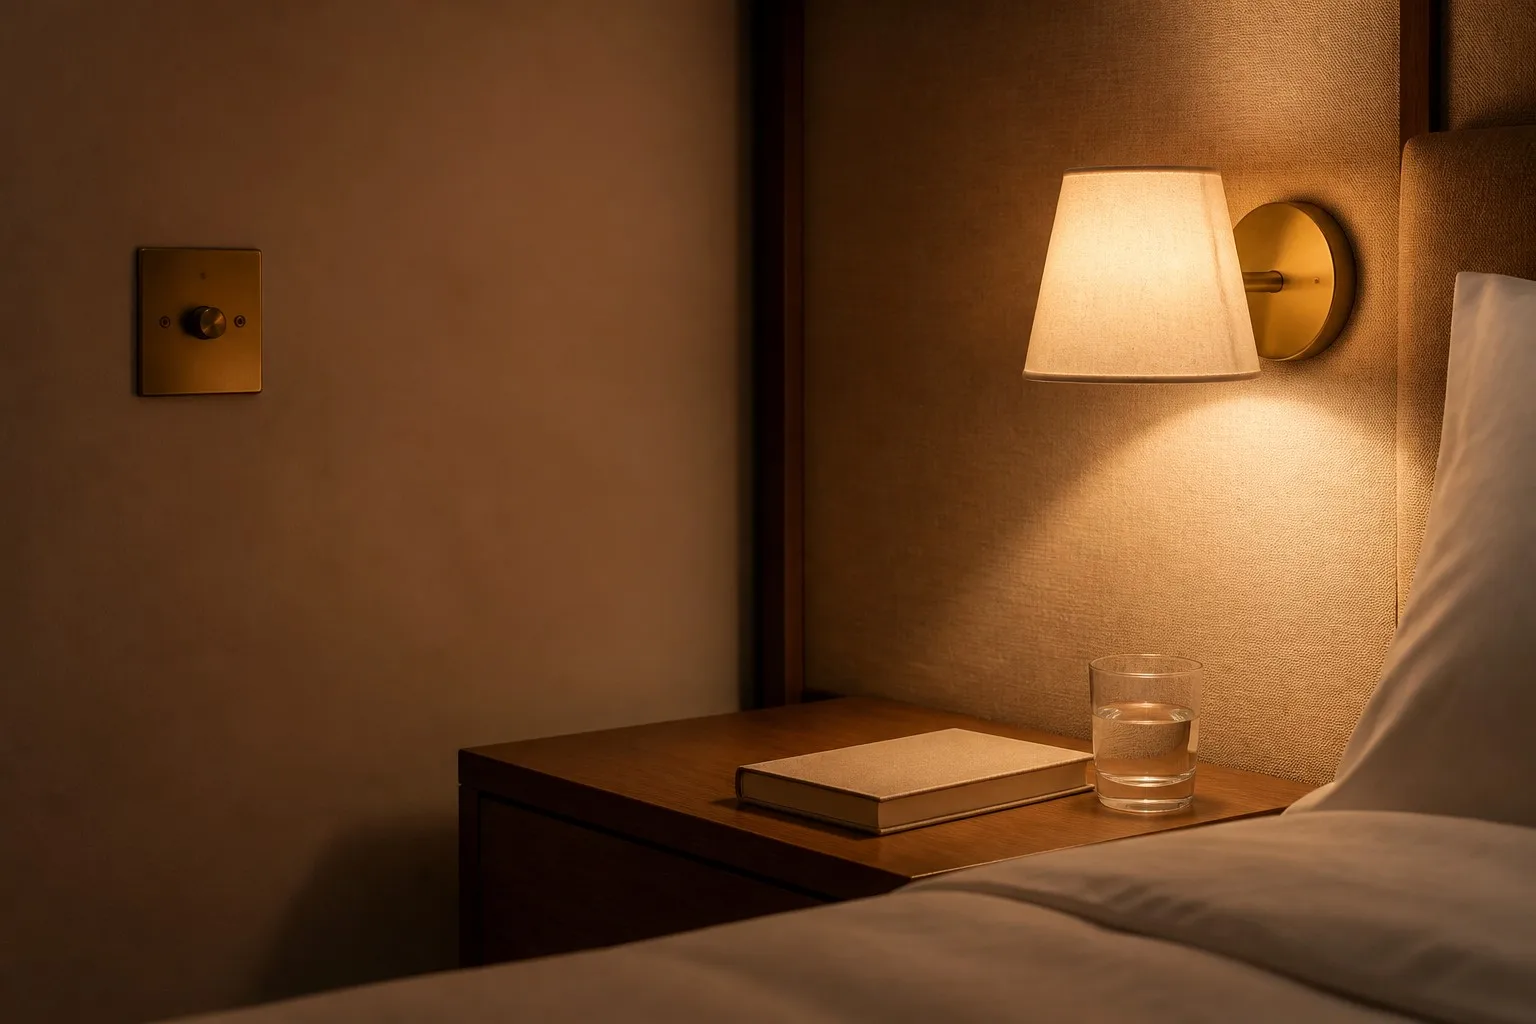
Hotel bedside wall light at its lowest warm setting in a dark guest room
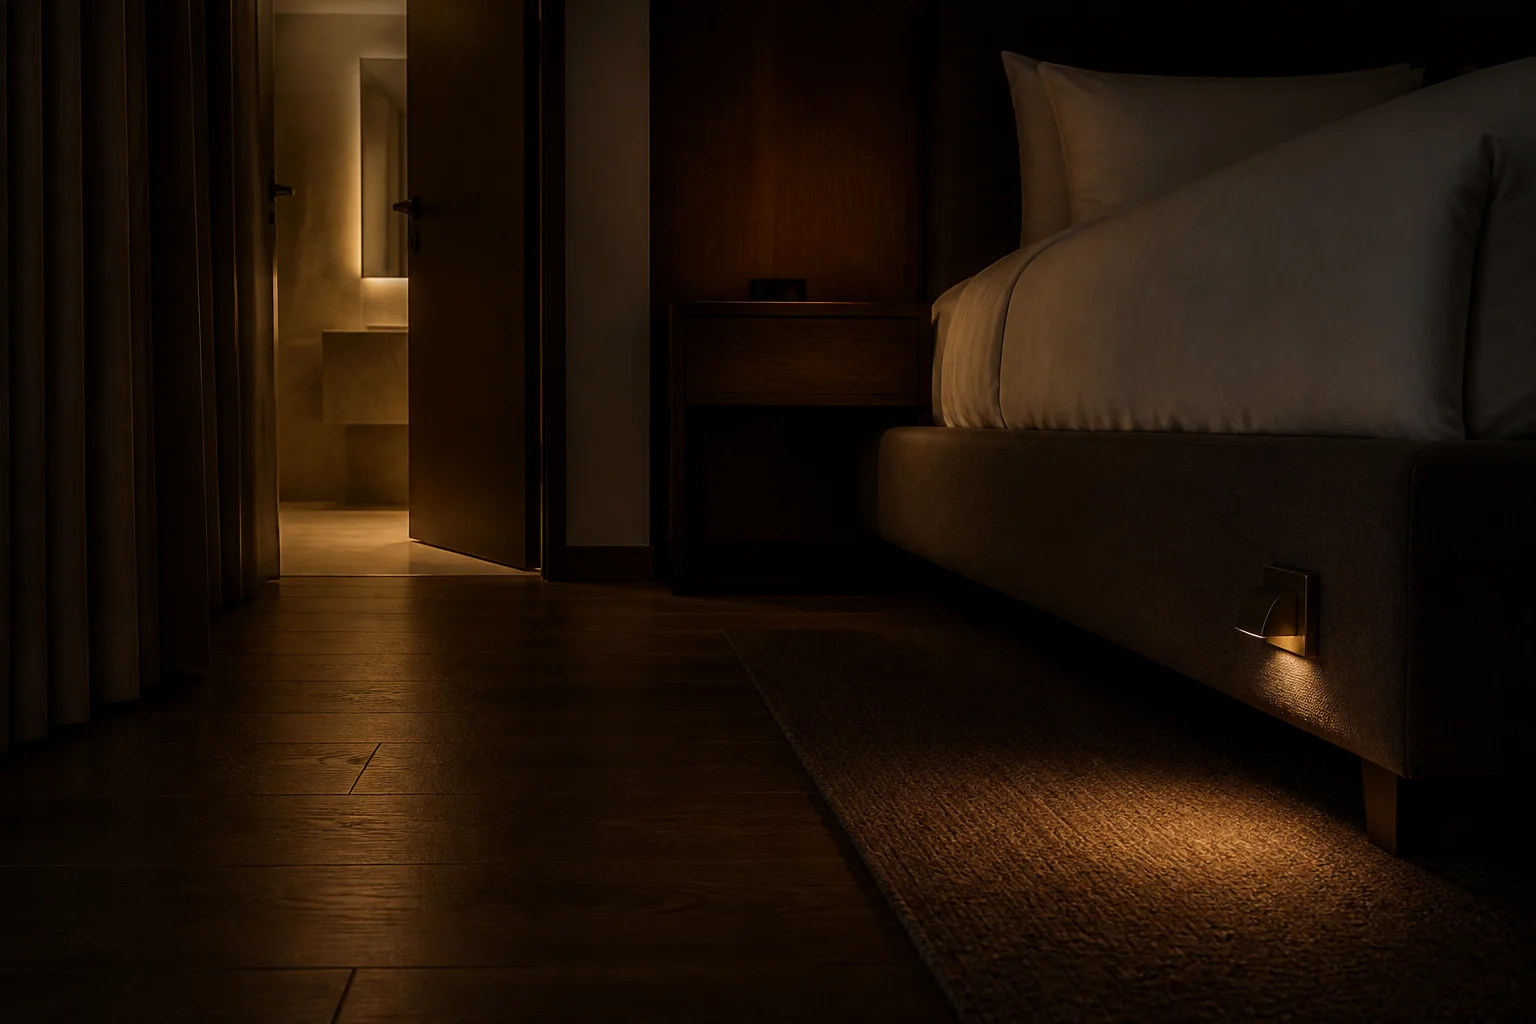
The level a guest lives with is whatever the fixture does at the bottom of the dimmer.

A room is judged at 3 a.m., not at check-in

Guests form a first impression in daylight, but the verdict comes in the dark. The complaints that reach an operator are rarely about maximum output. They are about the bottom of the range: what happens between off and a little, whether a control can be found without switching on the ceiling, and whether the room stays dark once the curtain is closed.

That is hard to demonstrate. A full-output photograph proves nothing; two products with identical headline figures can differ in the last ten per cent of travel. The honest test is a fade in the finished room, after dark, on the control the guest will touch.

One night, three moments

The guest room is not one lighting condition. It is at least four, and they are not served by the same settings.

MomentWhat the guest is doingWhat the lighting has to doWhat actually decides it
Evening, before sleepUnpacking, reading, settling inA low pool at the bed that does not reach the other pillowThe bottom of the bedside circuit, not its maximum
Lights outLast page, phone down, settlingReduce light to almost nothing without a step, click or blackoutDimming floor and the shape of the curve
3 a.m.Water, bathroom, back to bedEnough light to cross the room, not enough to wake the bodyNight provision and where its control sits
First lightStill asleep, curtains closedDarkness where the guest believes darkness isCurtain overlap and the gap at the centre

Notice the missing column: colour temperature. Whether a room reads warm or neutral is settled early, with the concept. What decides sleep is how the room behaves at low output.

Where dimming actually fails: the bottom of the travel

Most specification conversation concerns output at full. Almost none concerns the last ten per cent of the rotation, where the guest spends the evening. Three failures account for most complaints, none visible on a summary datasheet.

A dead band. Nothing happens for the first part of the travel, then the light arrives in one jump. The guest expects a small change and gets a large one.

A visible step. The light dims in discernible increments, which is not comfortable on a fixture a metre from a pillow.

A cut-out at the bottom. Below some threshold the driver stops, so the last part of the rotation does nothing and the light snaps off.

A fourth behaviour is worth understanding rather than judging. Some sources shift warmer as they dim; others hold colour and read colder. Neither is wrong, but half and half in one room looks inconsistent, usually because the bedside and the ceiling came from different families.

A dimmer that reaches one per cent on a datasheet and jumps at fifteen per cent in the room has not dimmed. The guest experiences the jump, not the number.

The test is cheap: a full fade in the room, after dark, on the intended control and lamp. Record the lowest level still useful for reading and the level at which the light cuts out. Both belong in the handover pack.

The switch a guest has to find without looking

At three in the morning nobody reads a label. The hand goes where it went at eleven.

A flat panel with no tactile reference is invisible to a hand; a rocker with a physical edge is findable without a glance. It is decided at specification stage and rarely discussed there, yet it decides whether a guest must sit up and switch on a general light to turn off a bedside light.

The standby indicator deserves the same scrutiny. A small blue LED on a touch panel is convenient in daylight and can be the brightest object in the room at night. Facing the pillow, it is no longer an indicator but a light source with no dimmer. Television standby lights behave the same way.

Then there is the conflict nobody owns. A door-card or master switch that kills the whole room, night provision included, means a guest returning in the dark crosses the room to find the card slot. Whether the night light sits on the master circuit is one line in the drawings.

When blackout and the night light work against each other

Blackout is a promise about darkness; a night light is a promise about not walking into furniture. They are usually specified by different people, installed by different trades, and first tested together the night the room is photographed.

The curtain line matters more than the fixture. A night light above the hem of a full-drop blackout curtain washes the ceiling, where a guest lying on their back will see it. Below the hem, the same light spills under the curtain onto the floor.

Reflection is the second trap. A night light aimed across a glossy television panel or a mirror doubles itself, and the reflected patch can land at eye level from the pillow.

The third is the curtain. A gap at the centre overlap, or a track that stops short of the wall, puts a stripe of corridor light across the bed at dawn. It is found in the mock-up or not at all: lie on the bed at night, curtains closed, and look for light that should not be there.

A night walk-through, and what to record

Commissioning is usually a daytime activity with a clipboard and a torch. One evening visit per room type changes what gets handed over.

  • Enter from the corridor with the room dark and note the first thing you can see.
  • Fade each bedside circuit slowly and record where it steps, flickers or cuts out.
  • Lie on the pillow and look at every indicator, sensor and standby LED.
  • Cross to the bathroom and back without touching a general light.
  • Close the blackout curtains and check the centre overlap and both edges.
  • Test the master switch and door card, and confirm which circuits stay live.
  • Write the minimum usable level and the cut-out level into the handover pack.

Bring the operator's representative, the commissioning engineer, and someone from housekeeping. Housekeeping sets the evening state, and a room that is perfect when the technician leaves can be reset to full brightness by a turndown routine nobody documented.

On a phased rollout the handover pack is also the specification for the next phase. A second batch is ordered months later, and the only record of how the first behaved at low level is what was written down.

FAQ

Does warm dimming help guests sleep?

It changes how the room looks at low level, which is why designers use it. It does not replace a low enough minimum, a findable control and a room that stays dark.

What is a sensible minimum level for a bedside light?

It depends on the shade, the source and the room. The workable definition is functional: the lowest level at which a guest can still read without the light reaching the other pillow.

Should the night light be on the master switch?

Usually not, since the point is that it works when everything else is off. Whatever the arrangement, test it with the door card removed and the master switch off.

Can any of this be corrected after opening?

Some of it. Drivers can be replaced, controls swapped and scenes reprogrammed. Wiring routes, switch heights and curtain tracks generally cannot, so settle those before the mock-up is signed off.

The takeaway

Guests do not evaluate a room by its maximum output. They evaluate it at the bottom of the dimmer, in the dark, with one hand: where the dimming floor sits, whether the control can be found by touch, whether the standby light is brighter than the night light, and whether the curtain and the fixture were ever tested together.

None of it is expensive at drawing stage. All of it is awkward once the room is finished. One evening walk-through per room type, with the results written down, is the cheapest insurance on a hotel lighting package.

Zerouno Lighting (ZeroUNO) manufactures hospitality decorative lighting in Zhongshan, China, including wall lights, bedside reading lights and bespoke ceiling fittings, with custom work since 2013. Because the low end only shows itself in the finished room, custom orders begin with a single-piece approval sample and a 25 to 35 day production window. Learn more at zerounolighting.com.

About the author

Sonny Yu is Sales Manager at Zerouno Lighting in Zhongshan, working with hotel owners, designers and procurement teams. He writes about the details that decide how a property lives with a fixture: dimming behaviour, serviceability, and the documents that outlast the opening date.

2026年10月12日星期一

Accessible Hotel Lighting: Switches, Contrast and Reach

Most lighting specifications are written for a guest who can see the room clearly and reach a switch without thinking about it. Many hotel guests are not that guest: older eyes need contrast rather than simply more light, a guest using a walking aid needs the control within reach, and a guest with low vision needs to find the switch by touch.

This guide is for the people who settle those details before the fittings are ordered: the designer writing the specification, the procurement team comparing quotations for the same room, and the owner's representative signing off the mock-up. It covers what accessibility changes in the drawing and in the fixture.

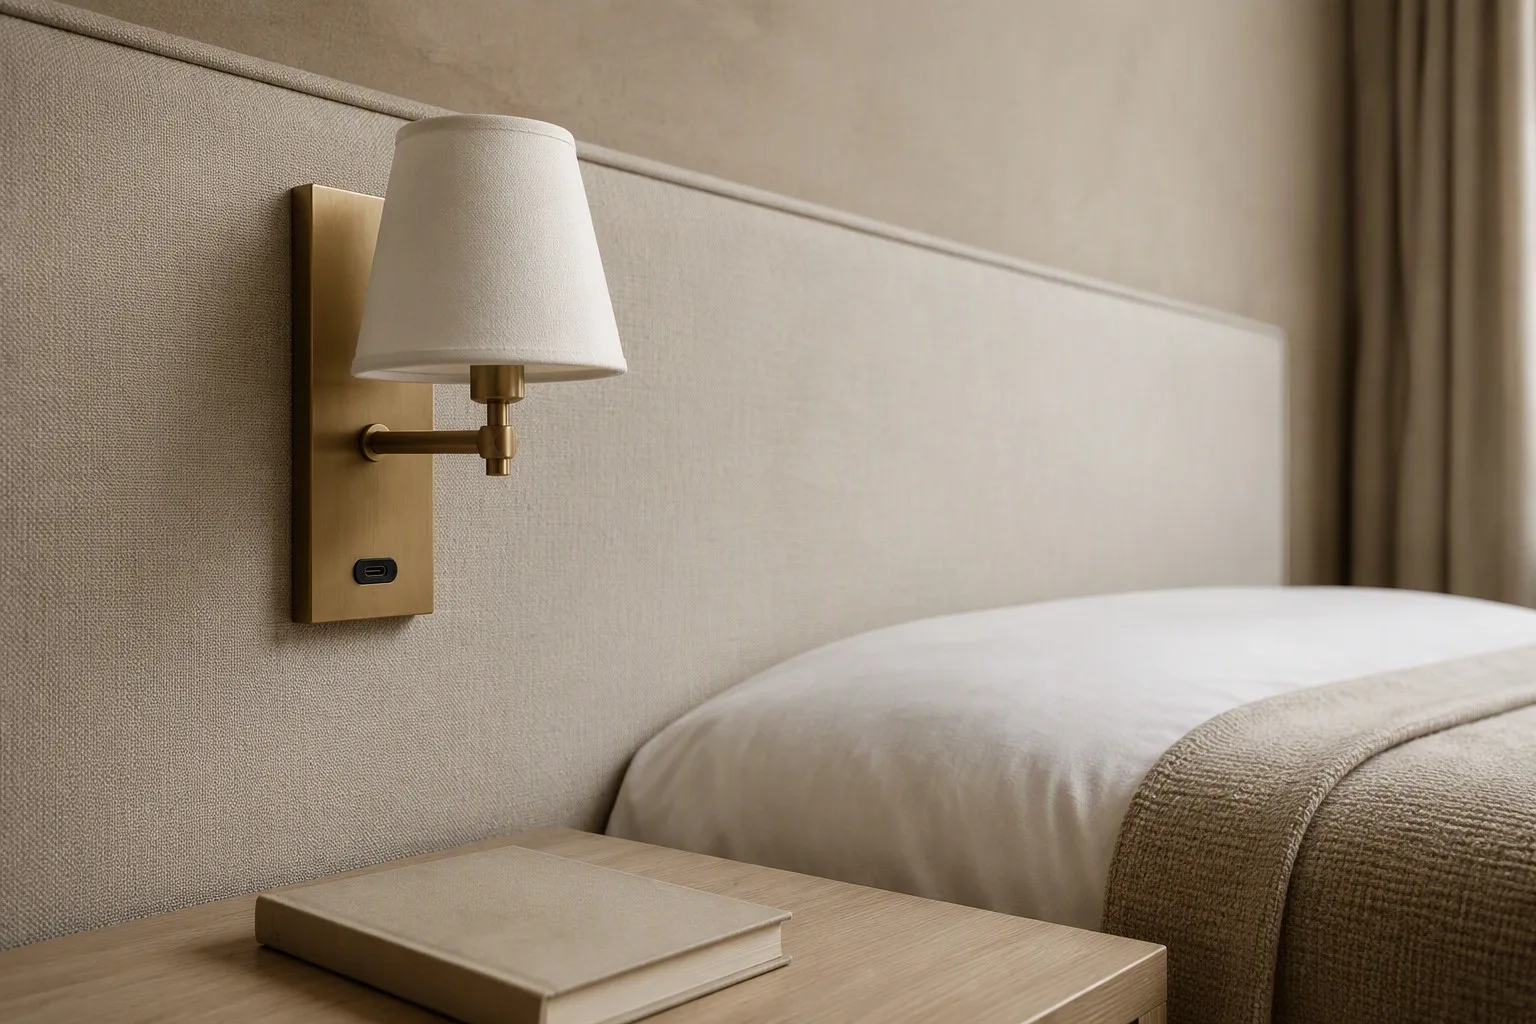
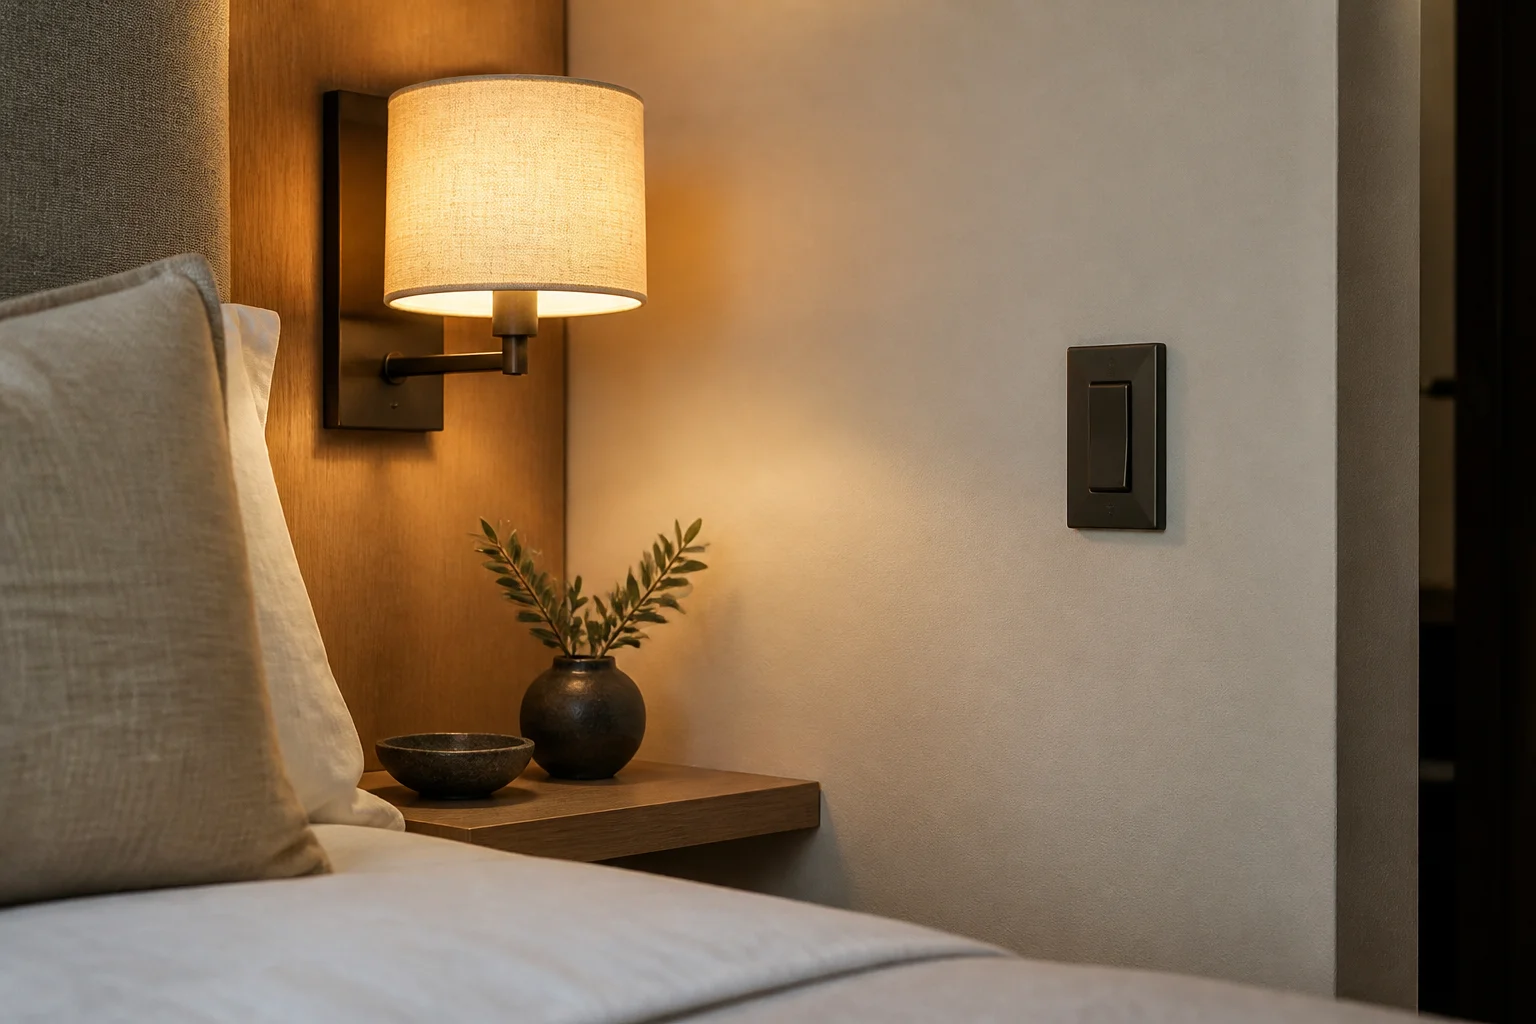
Wall-mounted hotel bedside reading lamp beside a contrasting wall switch plate
Reach and contrast decide whether a bedside control is usable, and both are settled on the drawing rather than by the fitting.

Accessibility is a design standard, not a product certificate

Accessibility requirements for hotels are set by a national or regional design standard, and they govern how a building performs rather than which mark a fixture carries. In the United States the instrument is the accessibility standard attached to the Americans with Disabilities Act; other markets write an equivalent into local building regulation. A compliance schedule is checked in the building, a product certificate on the light itself.

That changes what a supplier can responsibly promise. A manufacturer can supply a plate that steps away from its wall, a control that can be operated without looking, a dimmer that behaves at low output, and a fixture that shields its own source, but it cannot certify a corridor as accessible. The useful question is not whether a pendant is compliant on its own, but whether the parts that touch the requirement are documented well enough for sign-off.

Reach decides where the control can live

Reach is the constraint that most often forces a design change, because it is settled by the drawing and not by the fitting. The applicable standard states a reach range for controls, and a switch outside it is inaccessible however well it is finished.

Three consequences follow. At the bed, the control must be usable from a seated or lying position on the side the guest actually sleeps, decided before the joinery is drawn: a bedside light whose only switch sits on the shade can end up unreachable once the bed is against the wall. Physical operation also beats surface: a rocker has an edge that can be found without looking, while a flush touch pad offers no tactile reference. A control should also avoid sitting behind a bedside table or under a floating vanity edge, where it can be seen but not reached.

Accessibility constraintWhat it changes in the drawing or the fittingWhat to verify before handover
Control reachPlacement of every switch and dimmer the guest operatesReach each control from the bed and from a seated position, with joinery installed
Control identificationPlate tone and sheen against the wall, plus a tactile or backlit elementFind and operate the control in the dimmest state the room is used in
Glare controlShielding, baffles or a diffusing shade on fixtures near eye heightLook toward each source and its image in polished surfaces
Task lightingA dedicated light at bedside, mirror, desk and wardrobe instead of higher ambientCheck each task point against the level the designer specified
Egress separationDecorative elements moved clear of exit signage and emergency devicesConfirm emergency devices operate independently of decorative dimming
Room-to-room consistencySame control layout and fixture family in accessible and standard roomsWalk an accessible room and a standard room back to back

Contrast is how a switch becomes findable

A switch finished to match its wall exactly is a common design choice and a common accessibility failure. Requirements are usually expressed as a contrast between control and background, because contrast, not brightness alone, is what lets an older or low vision guest find the plate.

This is where finish decisions collide with guest experience. Satin brass on cream polished plaster, or dark bronze on dark timber veneer, reads well in a render and disappears at night. The fix is rarely a different fitting: it is a plate that steps away from the wall in tone or sheen, plus a tactile element such as a raised bar. A guest should be able to find the control in a dark room.

Glare is an accessibility issue, not a comfort preference

As the eye ages the lens scatters more light, so a bright source against a dark background produces veiling glare and the guest sees less rather than more. A specification that treats glare as a matter of taste will fail precisely the guests the requirement exists to protect.

In practice that means shielding any bare lamp at or near eye height, using baffles or a diffusing shade rather than an exposed source, and watching the polished surfaces a seated guest faces. A mirror light that throws its own image into the eyes of someone at the vanity is a glare defect, and so is a bedside lamp reflected in glass.

An accessible room is not a different lighting scheme. It is the same scheme with reach, contrast and glare resolved before the fittings are ordered.

Light levels belong to the project, not to the datasheet

Lighting levels are set by the designer of record against the standard in force, which is why a manufacturer should not publish one universal target figure for a guest room. What a supplier can document is the behaviour that delivers those levels: output and distribution, shielding, dimming range and colour quality. Accessibility work then happens at the task points, because lifting a whole ceiling to fix the bedside produces glare elsewhere.

Nothing decorative may obscure the egress route

Accessibility and life safety are separate requirements, and they meet on the corridor wall. Decorative rhythm must never cover, crowd or outshine exit signage and emergency lighting, and a corridor that reads as an evenly decorated tunnel is a wayfinding failure as much as an aesthetic one. A readable route comes from a sequence of cues, not from even spacing alone.

Two drawing rules follow. Where a decorative element and an exit device compete for the same position, the exit device wins and the decorative element moves. And dimming must not reach the emergency devices at all: they stay on their own circuit, so a scene change late at night cannot touch the route out.

What to write into the specification

Most accessibility problems in lighting are settled by documentation rather than hardware:

  • Place every control inside the reach range the project's standard sets, and show the reach from the bed and from a seated position on the drawing.
  • Nominate each plate finish against the wall it sits on, as a contrast statement rather than a swatch on its own.
  • Require tactile identification on every control the guest must find in the dark.
  • Require shielding or a diffusing shade on any fixture mounted at or near eye height.
  • Keep emergency and exit devices on circuits separate from decorative dimming.
  • Keep the fixture family and control layout consistent between accessible and standard rooms, so spares stay common.

FAQ

Can a supplier certify a hotel lighting scheme as accessible?

No. The requirement applies to the building and is verified against the design standard in force for the project. A supplier can document reach, contrast, shielding and control behaviour for the parts it makes, which is what the design team needs for its compliance statement.

Does accessibility mean brighter rooms?

Not usually. Older guests tend to lose contrast sensitivity and glare tolerance before light sensitivity, so better contrast, better shielding and better light at the task point often achieve more than raising overall output.

Where should a bedside light switch be positioned?

Within the reach range the project's standard sets, measured from a seated position on the side of the bed where the guest sleeps. Confirm it after the joinery is installed, not on the drawing alone.

Are touch dimmers a problem for accessibility?

They can be. A flush touch pad gives no tactile edge, so a guest who cannot see it clearly may struggle to switch a light off. A rocker, or a pad in a defined surround, is easier to find and operate.

Do accessible rooms need different light fittings from standard rooms?

Usually a different placement and control treatment rather than different fittings. Keeping one fixture family across both room types simplifies spares and makes the differences in reach and contrast explicit.

The takeaway

Accessibility in hotel lighting is mostly decided on the drawing and in the finish schedule, not on the crate. Put every control within reach of the position the guest actually uses, nominate each plate against its wall so the switch can be found without light, shield anything that would sit in a guest's eyesight, and keep decorative dimming away from the egress route. Document those four things and the room becomes usable without the scheme changing character.

Zerouno Lighting (ZeroUNO) manufactures hospitality decorative lighting in Zhongshan, China, including wall lights, bedside reading lights and alabaster-bodied pieces for hotel projects. Custom work begins with a single-piece approval sample, and every order carries a two-year warranty with a 48-hour response on service questions. Learn more at zerounolighting.com.

About the author

Sonny Yu is Sales Manager at Zerouno Lighting in Zhongshan, working with hotel owners, designers and procurement teams on bespoke decorative lighting. He writes about the decisions that are cheap to correct on a drawing and expensive to correct on a finished wall.

2026年9月30日星期三

Hotel Suite Lighting vs Standard Rooms: Where to Spend More

Most hotel projects write one lighting schedule for the standard room and scale it up for the suite: more fixtures, a busier ceiling, the same layers on the same switches. The room grows, but the lighting still does what a single-room scheme does.

This guide is for the people who decide that schedule: owners setting the room mix, designers writing both types, and procurement teams turning the two into one order. It covers where extra spend on a suite is actually felt, where it disappears, and how to keep two room types in one fixture family.

Hotel suite seating area lit by a separate decorative layer while the ambient layer stays low
In a suite the decorative layer has to drop low while the working layer stays up, which means two circuits rather than two fixtures.

A suite is not a bigger standard room

A standard room answers one sequence: arrive, unpack, sleep, leave. A suite is used in several modes during a stay, often by two people at once. That difference, not the floor area, is what its lighting has to answer.

  • Two people run on different schedules. Unless the reading and ambient layers switch apart, one guest decides for both.
  • Work and rest share the space. A laptop on the dining table in the evening is a task-light job sitting in the middle of an ambient scheme.
  • The room is used socially. A seating group has to hold a conversation or a room-service tray, a scene a standard room never supports.
  • The bathroom is a room, not a pit stop. Larger bathrooms and separate dressing areas are where the worst-lit corner usually sits.
  • The guest moves between zones. Living to sleeping to dressing means transitions a single-scene schedule does not resolve.

None of this is fixed by a higher fixture count. It is fixed by the number of independently controlled layers.

Where the extra spend is felt, and where it disappears

Suite lighting is judged in three moments: arriving after dark, working or reading while someone else sleeps, and using the bathroom and dressing area. Those are where additional spend earns its place.

The commonest misallocation is buying more of the same thing. A second identical decorative fitting on the same dimmer adds weight to the ceiling and nothing to the room. More output does not read as luxury; separation does.

The second sits in the control layer. A suite with twelve scenes nobody can name is worse than one with four the front desk can explain over the phone.

Which layers usually deserve the difference

Read the two room types side by side, layer by layer. The last column decides where the money goes, because it names the moment a guest would notice.

LayerWhat the standard room uses it forWhat the suite addsWhere the difference is felt
Entry and arrivalLight to enter and find the switchesA decorative piece on the arrival axis, on its own circuitThe first ten seconds through the door
Ambient and decorativeOne layer carrying the roomAmbient and decorative on separate dimmersReading while the decorative layer stays low
Work and diningAbsorbed into the general layerA directed layer on the table or deskLaptop work with no shadow on the keyboard
Bathroom and dressingTask light at the mirrorSeparated vanity, dressing and night levelsThe hour before dinner, and the 3 a.m. trip
Night pathDimming the bedside fittingA dedicated low-level routeA second occupant who is not woken
ControlA handful of states for one roomIndependent control of living and sleepingTwo guests using the suite differently at once

Three upgrades that consistently pay back

  • Bathroom and dressing as layers of their own. In a suite this is often the space guests describe afterwards. Separating vanity light from a night level and from the dressing area turns one difficult room into three workable ones.
  • Living and sleeping on independent control. This is what lets one person stay up without lighting the whole suite, and it is a wiring decision taken before any fixture is chosen.
  • One considered piece on the arrival axis. A single deliberate fitting carries more character than an extra row of matching fittings along the ceiling.

Where suites quietly waste money

  • Duplicated fittings on one dimmer. Two of the same fixture on one circuit is one impression, bought twice.
  • Brightness as a proxy for quality. Raising output flattens the room and loses the contrast that makes a scheme read as layered.
  • Scene lists longer than the staff can use. They age badly and make later changes harder to trace.
  • Upgrading guest-invisible surfaces. Ceiling fill rarely registers with the person paying for the room.
  • A second fixture family for the suite. Two design languages double the spares holding and the finish references kept for the hotel's operating life.

Keep both room types in one family

Differentiation should come from layers and placement, not from a second design language. Where both room types share a fixture family, a finish reference and a control protocol, the hotel keeps one set of spares, one approved sample and one set of drawings for the whole room mix.

  • Same family, different layer count. The suite carries more separately switched layers rather than different products.
  • One finish reference for both. Later replacements and later phases are matched against a single approved sample.
  • One driver and control protocol. Behaviour at low output stays consistent between the two room types.
  • Repeatable positions across suites. Identical layouts should place fittings in the same positions so maintenance is predictable.

Deciding before the schedule is issued

  • List the ways the suite is really used and name the layer that serves each one.
  • Mark which layers are suite-only and which are shared with the standard room.
  • Check that each suite-only layer sits on its own circuit and dimmer.
  • Walk the arrival sequence from the door and confirm which layers fade up first.
  • Confirm both room types still share one fixture family, one finish and one control protocol.
  • Agree the scene list and its names with the operator before handover, not after commissioning.

What to write into the specification

  • The layer list per room type, with the control grouping for each layer.
  • Which fittings are shared between room types and which are suite-only.
  • The dimensions and mounting interface that must repeat across identical suites.
  • The control protocol, including the lowest level a fitting must hold without flicker.
  • The service access route for every fitting; a suite ceiling is the least reachable in the building.
  • The approved finish sample and the reference later phases are matched against.
  • A mock-up covering one suite and one standard room, judged together.
The test of suite lighting is not whether it looks richer than the standard room. It is whether two guests can use the same room in different ways on the same evening without negotiating over the switches.

FAQ

Should a suite use different fixtures from the standard room?

Usually not. One fixture family protects the spare parts holding, the finish reference and the approved sample for the hotel's operating life. The suite should differ in how many layers it carries and where fittings sit, not in design language.

Where does the biggest difference between a suite and a standard room belong?

In the bathroom and dressing area, and in the separation of living from sleeping. Both are places where a suite is genuinely used differently, and both are decisions about circuits rather than more fittings.

How many lighting layers does a suite need?

Enough to cover the ways the room is actually used, each on its own control: ambient, decorative, work, bathroom, night, plus a grouping that splits living from sleeping.

Does a suite need more light than a standard room?

Not necessarily, and treating brightness as the difference is the commonest mistake. How much light each task needs is for the project's lighting designer to set against the applicable standard. What a suite needs is layers that switch independently.

What is the commonest suite lighting mistake in a hotel project?

Scaling the standard room schedule upwards: more fixtures, the same switch groups, a decorative layer tied to the working one. The result is a larger room two people still cannot use in two ways at once.

The takeaway

The difference between a suite and a standard room is not how much lighting is installed but how much can be controlled separately. Put the extra spend where a guest meets it: the bathroom and dressing area, the split between living and sleeping, and one deliberate piece at the arrival point. Leave the duplicated fittings, the higher output and the inflated scene list alone. Keep both room types in one fixture family, one finish and one control protocol, and the room mix stays serviceable for the life of the hotel.

Zerouno Lighting (ZeroUNO) manufactures hospitality decorative lighting in Zhongshan, China, and has built project and custom fixtures since 2013. Suite and guest room layers are usually resolved together, starting from a single sample piece so control grouping, mounting and finish can be checked before the schedule is frozen. Learn more at zerounolighting.com.

About the author

Sonny Yu is Sales Manager at Zerouno Lighting, working with hotel owners, designers and procurement teams on decorative lighting packages. He writes about the decisions that are cheap at drawing stage and expensive afterwards: how a room is layered, where each layer is switched, and what has to be written down before an order is released.

2026年9月27日星期日

Rechargeable and Plug-In Wall Lights for Hotel Retrofits

A guest room goes into refurbishment with a new headboard and a lighting plan that shows a slim wall light each side of the bed. Then the drawings come back: solid wall, no back box, a tiled bathroom on the far side, and a corridor that cannot be closed for chasing and inspection. Reopening that wall means dust control, electrical sign-off and rooms out of service for longer than the programme allows. So the conversation moves to rechargeable and plug-in wall lights.

This guide is for the hotel owner, project manager and procurement lead solving a lighting problem in a building that already exists. It covers the retrofit routes that avoid chasing the wall, what each commits the hotel to operationally, and how to sign the arrangement off before it is repeated across forty rooms.

A rechargeable hotel wall light with its head lifted off the wall bracket, above a charging dock on the bedside table
The head lifts off the bracket to charge, which is what removes the need for a circuit at the bed position.

Why a retrofit changes the lighting question

In a new build, the fixture is chosen first and the wiring follows the design. In a retrofit the order is reversed: the wall is fixed, the finishes are done, and the fixture has to live with conditions nobody designed it for. Three questions then move to the front of the specification.

  • Power becomes an operating decision, not a technical footnote. If the light is not on the mains, someone has to charge it and keep it lit.
  • The mounting detail decides whether the design is possible at all. Hollow plasterboard on steel studs, plaster over blockwork and a tiled wall are three different projects.
  • The guest-handling case matters as much as the light. A fixture a guest can unhook or take away will not survive a year of operation.

The four ways to put light on an existing wall

The table compares the routes that avoid opening the wall, what each one needs from the building, and the consequence that follows. It does not replace a lighting design; it narrows the options before a designer is asked to approve one.

RoutePower sourceWhat it needs from the wallOperational consequence
Rechargeable wall light with a removable headBattery in the head, charged off the fixtureOne fixing point; no cable, no back boxCharging location and spare rotation
Plug-in wall lightCord to an existing socketA socket within reachCord routing, socket sharing, appliance testing
Surface trunking to a wired fittingMains via surface containmentA containment run and an isolatorVisible containment accepted by the designer
Existing point re-aimed or repositionedThe circuit already thereNothing new on the wallWhether the result justifies no wall light
Light integrated into new joinery or a mirrorLocal supply in the new unitJoinery able to carry the fixtureJoinery lead time and maintenance access
The power source stops being a technical footnote the moment the wall cannot be opened. It decides who charges, who cleans, how the fixture is replaced, and whether housekeeping can keep it lit at all.

What each power option commits the hotel to

The specification is only half the decision. The other half is the routine the option creates, and that routine stays with housekeeping for the life of the room.

Battery fixtures with a removable head

These work when the routine is designed. Someone has to own the charging, and there has to be a charged spare so a room is not dark while a unit sits on the dock. Capacity also falls over the years, so the fixture is a service part as well as a fitting, and the replacement reference belongs in the handover pack.

Plug-in fixtures

A plug-in wall light is the simplest route where a socket already exists, and the least predictable in operation. The cord has to run somewhere, and a cord across a walk path or pinched behind a headboard is both a safety and a wear item. Sockets near beds are also the ones guests unplug to charge a phone, so the light is off when it is expected to work.

Wired fittings on surface containment

This option behaves most like a normal installation: no charging, no cords, no battery replacement. It is also the only one that leaves a permanent mark on the interior, so it needs the designer's agreement. Containment finish matters as much as fixture finish, because the two are seen together at close range.

Mounting and the wall you already have

Weight, substrate and hidden services decide whether a chosen fixture can actually be fitted, and they are checked in the room rather than on the plan.

  • Identify the substrate before ordering fixings. Plasterboard on studs, plaster over blockwork and solid brick need different fixings.
  • Assume services are in the wall until proved otherwise. Old conduit, water and drainage rarely appear reliably on refurbishment drawings, so confirm fixing positions with a detector before anyone drills.
  • Check the lever arm, not only the weight. A fixture that projects from the wall loads its fixing differently from one that sits flush.
  • Respect the compartment and the finish. Any penetration into a fire-rated or tiled surface belongs to the project team, not to an installer's judgement on the day.
  • Confirm the switching reach. A light a guest cannot reach from the bed will be left off, and the retrofit will have spent its budget on a fixture nobody uses.

Where retrofit wall lights go wrong

  • A cheap rechargeable unit is bought as a stop-gap for two rooms, then kept in service for years.
  • No charging point is designed, so units get charged at a desk, behind a curtain or in a back office nobody controls.
  • Battery fixtures are specified without a spare rotation, so a room stays dark for as long as a charge takes.
  • A cord is routed across a walk path or pinched behind a headboard, and fails the first housekeeping inspection.
  • No mock-up room is used, so the first forty rooms become the test.

A sign-off checklist for the first rooms

Run this in one completed room before the rollout, at night, with the person who will maintain the fixture.

  • Inspect the finished room at night, not from a drawing or a sample board.
  • Sit on the bed and confirm a guest can switch the light without getting up.
  • Time the charging routine with housekeeping, including the swap of a spare unit.
  • Walk the cord or containment route as a guest would, and check that nothing crosses a walk path.
  • Check the fixing on the real substrate, including a pull test on the bracket.
  • Record the spare part reference before the order is repeated.

FAQ

Does a rechargeable wall light need a mains connection at all?

No. A fixture with a self-contained battery and a removable head needs only a fixing point on the wall, which is what makes it usable where a circuit cannot be added. It still needs a charging location and a spare unit, agreed before the order.

How long does the battery last?

Runtime and service life depend on the fixture and on how the room is operated, so work from the figure stated for the specific model being quoted. Treat the battery as a service part with a replacement path rather than a permanent component.

Can a property mix plug-in and rechargeable lights in the same corridor?

Yes, and it often does, because rooms differ. Mixing types is fine while the finish and appearance stay consistent. What causes trouble is mixing them without telling the team which room has which.

Will a retrofit wall light look like a compromise?

Only when the power route is visible and unplanned. A removable head on a well-made bracket, or containment in a matching finish, reads as a deliberate detail. A cord taped along a skirting board never does.

The takeaway

In a retrofit the wall decides more than the fixture does. Where no circuit can be added, choose the power route first and the light second. Plan the charging location and the spare rotation with the fixture order, and confirm the substrate, fixing and cord route in a real room rather than on a drawing. Done in that order, a retrofit wall light is the version of the design the building could actually take.

Zerouno Lighting (ZeroUNO) manufactures hospitality decorative lighting in Zhongshan, China, and has produced project and custom fixtures since 2013, with a single-piece sampling stage so a retrofit fixture can be assessed in the room before a production run is released. Learn more at zerounolighting.com.

About the author

Sonny Yu is Sales Manager at Zerouno Lighting, working with hotel owners, designers and procurement teams on decorative lighting packages. He writes about the decisions that only surface once a building exists: power routes that cannot be chased, mounting conditions that are not on the drawing, and the housekeeping routines that decide whether a specification survives its first year.

2026年9月23日星期三

Hotel Night-Path Lighting: Safety Without Waking Guests

A guest wakes at three in the morning and needs the bathroom. Switching on the room lights wakes the person beside them; crossing the room in the dark risks a fall. Night-path lighting exists to close that gap.

It is also the layer specified last and trimmed first, which is why it fails in ways nobody can quite name. This guide covers the three zones it has to serve, how control decides whether it works, and what to write into the RFQ.

Shielded low-level night light beside a hotel bed, casting a soft pool of light along the night path to the bathroom
A night path works when the guest never looks into the light: shielded at floor level and aimed at the route, not the room.

What night-path lighting actually has to do

Night-path lighting carries two requirements that pull against each other. It has to give a guest enough visual guidance to cross a space they cannot fully see, and it has to stay dim enough that the person still asleep is not disturbed.

That is not a decorative problem. A layer that is too bright fails the second requirement; a layer with no shielding fails the first, because a source the guest looks into is glare rather than guidance. How much light the path needs is for the project's lighting designer, not a figure a supplier should invent on a specification sheet.

The three zones of a night path

Guests meet a night path not as one layer but as three separate moments, and a scheme usually fails in one of them rather than all three.

ZoneWhat the guest needsHow it usually failsDesign response
Beside the bedLight to find the floor and footwear without leaving the mattressThe only source is the reading light at working brightnessA shielded low-level source, or a dim-down switched separately from reading
The route to the doorA continuous guide along the walking lineA gap mid-route, or a fitting that comes on at full outputEven spacing along the walking line, starting low rather than rising to working level
Inside the bathroomTask light at the mirror, with nothing spilling into the bedroomNight and vanity lighting share one switch and one outputA separate low-level night circuit

Two zones sit inside the room and one behind a door, which is why different people often specify them separately.

Why placement beats brightness

When a low-level night light feels uncomfortable, the instinctive fix is to lower its output again. The real problem is usually where it sits and what the guest sees of it.

A small source left open to the room becomes more visible, not less, when the guest sits up or swings their legs out of bed: it sits near eye level just as they look for it. Deep baffles, a recessed aperture, a down-facing slot or an opaque housing all solve that without reducing guidance. In decorative schemes a well-resolved shade does the same: closed on top, open only where the light is wanted.

Colour temperature belongs here too. A warm source reads as night to a guest who is half asleep; a cool source reads as daylight and signals alertness, so reserve warm light for the night layer.

Motion sensing: where it helps and where it fails

Sensing makes a night path feel responsive: the light appears where the guest is going. It also introduces failures unswitched designs do not have, most decided at commissioning.

  • Field of view. A sensor that sees the whole bed triggers when a guest turns over; aim the detection zone at the floor beside the bed, not across the mattress.
  • False triggers. A vent, a curtain shifting in a draught or warmth from next door will trip a badly aimed detector; guests notice a light that comes on for no reason.
  • Hold time and fade. A long hold leaves the guest unable to switch off; an abrupt cut-off is startling. A slow fade makes the layer feel intentional.
  • Starting level. A sensor that switches straight to working brightness defeats the layer; it should trigger at the low level the room uses at night.
  • Where the logic lives. A sensor in the room control system can be reconfigured later; one embedded in a fixture cannot.

The test is a dark walk-through after commissioning, with the room set up as a guest will find it; a scheme signed off from a sheet alone will not survive a real night.

The bathroom night light is a separate layer

Bathroom lighting is normally specified as a task layer: light at the mirror for washing and dressing. Night lighting is a different job in the same room, and the two should not share a switch.

Where they do, a guest either wakes the room by switching on the vanity light or arrives to find the bathroom dark. A separate low-level source at floor or kick level keeps the night function on its own circuit and leaves the mirror layer free to work properly.

The detail that undoes it is spill back into the bedroom: a door swinging over a bright floor-level fitting, or a gap that throws a strip of light across the bed. Toilet and shower zones deserve the same pass, because retrofitting into a tiled zone later costs far more than specifying it now.

Retrofit constraints when you cannot pull new cable

Much of this layer is added to hotels already open, or in refurbishment, where walls are finished and ceilings are staying up. A night path is still achievable, but the solution is decided by what services already exist.

What the room already hasWhat it allowsWhat to watch
A switch leg at the bedsideIndependent night switchingWhether the wiring allows separate control
A socket behind joineryA plug-in fixture with the cord concealedWhether housekeeping can reach the plug
No wiring at allA rechargeable fixture with an integral batteryCharging becomes a housekeeping task: name who does it
An existing controlled circuitNight scenes added in softwareThe lowest level the fittings hold without flicker

Whichever route is used, settle the maintenance model with the fixture: a rechargeable night light with no charging rota and no spare battery stops working in month three, and arrives as an operations complaint rather than a lighting one.

What to put in the RFQ

  • The zones the scheme has to cover, and which fitting serves each one.
  • Whether night switching is separate from the reading and vanity functions.
  • Sensor logic: field of view, starting level, hold time and fade.
  • The control interface, and the level the fitting must hold steady.
  • Service access, plus the driver and battery references needed in year four.
  • A mock-up requirement, because a night path is judged in a dark room.
The layer guests use most often is the one that gets value-engineered first, and it is the one they remember as a fall or a disturbed night.

FAQ

Does every guest room need a night path?

Not in the same form. A suite with an inner bathroom needs a longer, more considered route than a standard room, where a dim-down of the bedside fitting plus a shielded bathroom source often suffices.

Can the night light share a switch with the bedside reading lights?

It can share the fitting but not the switching. A reading light needs working brightness aimed at a book; a night light needs a low level aimed at the floor and the route.

Is passive infrared better than presence detection?

It depends on the layout rather than the technology. Infrared suits a tight zone beside a bed; presence detection covers more area but can see through a partition if aimed carelessly.

Can a night path be added without rewiring?

Usually yes, through an existing switch leg, a concealed plug-in fixture or a rechargeable one. The limit is the control logic: on a networked system a night scene may be a software change.

How do we stop bathroom light spilling into the bedroom?

Shield the source from the direction of the bed, keep the night fitting on its own circuit, and check the door in a dark mock-up rather than on a drawing. A fitting placed where it cannot be seen from the bed beats a dimmer one further away.

The takeaway

Night-path lighting is a safety layer that has to stay quiet. It fails predictably: too much visible source, switching tied to the wrong layer, sensors aimed at the bed, and maintenance nobody owns. Place the light so the guest never looks into it, keep the night circuit separate from the reading and vanity functions, and settle the sensor logic with a walk test in a dark room. Then write down how it will be maintained, because that decides whether it still works when the hotel is full. Done properly, guests never mention it, which is the point.

Zerouno Lighting (ZeroUNO) manufactures hospitality decorative lighting in Zhongshan, China, and has developed project and custom fixtures since 2013. Night-path and bathroom layers are usually resolved as part of a broader guest-room package, beginning with a one-piece sample so shielding, switching and finish can be checked before the room is closed up. Learn more at zerounolighting.com.

About the author

Sonny Yu is Sales Manager at Zerouno Lighting, working with hotel owners, designers and procurement teams on decorative lighting packages. He writes about the parts of an order that are easy to leave until late: how a layer is switched, where a fitting is fixed, and what must be written down before production starts.

2026年9月20日星期日

Hotel Bedside Lighting with Integrated USB Charging

Guests rarely complain that a bedside light was the wrong colour temperature. They complain that they could not charge a phone overnight. A bedside position is where two expectations meet: the fixture has to light the page, and increasingly it has to charge the devices a guest leaves running until morning.

This guide is for the people who write that requirement down and the people who build it: designers issuing a specification, procurement teams converting it into an order, and the engineering side making the fixture fit a closed wall. It covers where an integrated socket earns its place, what to settle before the order, and what to check on a sample.

Brass bedside reading light with an off-white fabric shade and an integrated charging socket in its backplate
A charging socket only earns its place if a guest can find it and the cable stays in while the light is on.

Why the charging socket became a lighting decision

For years the answer was a socket behind the bedside table and a power brick borrowed from the guest's own bag. That held while a guest travelled with one device. It stopped holding when the same guest arrived with a phone, a watch and a tablet.

Moving the outlet onto the fixture solves the physical problem and creates a specification problem. A bedside light is chosen on appearance and light output by a design team, and on price and lead time by a procurement team. A charging socket is an electrical assembly with its own rules, arriving as a line item nobody in the design conversation asked about. Charging therefore gets decided late, when the fixture is drawn and the wall box position, the backplate size and the depth behind the headboard are fixed. Two of those three can usually be absorbed. The third cannot.

An integral socket, or one the guest brings

Three arrangements are common, and they are not interchangeable.

  • Integral charging. The socket is part of the fixture and fed from the same supply as the light. Cleanest wall, one thing to clean, nothing to lose. It also turns the fixture into an electrical product with a charging output, which changes what has to be declared and tested.
  • A separate charging block. A dedicated unit mounted beside the fixture. Easier to service, and simple to replace when a connector standard moves on, at the cost of a second box on the wall.
  • A conventional socket, with the fixture untouched. Still right in some heritage interiors, and the fallback wherever the wall cannot take anything new. It leaves the cable in the guest's hands.

Integral charging is the arrangement guests notice most, and the one that punishes a shallow wall. Settle which of the three applies before the fixture is drawn: the answer changes the backplate, not just the wiring.

What the socket has to deliver, and why the connector matters

A charging socket is not one product. The connector families behave differently, and a hotel has to serve more than the device in this season's guest's hand.

What the guest bringsWhat the fixture must offerWhere it goes wrong
A phone with a current cableA socket that takes part in the fast-charging standardOnly trickle-charging; the guest notices overnight
A phone with an older cableThe previous connector still presentReception is asked for an adapter that does not exist
Two devices at onceEnough total output for both to finishOutput divides and both crawl
A tablet or a laptopA higher-output port, clearly identifiedPort looks identical and underperforms
Nothing of their ownAn obvious socket, or a findable portIt hides behind the shade

Two decisions sit under that table: which connectors to keep, since a specification offering only the newest connector looks tidy in a render and fails the guest still carrying the older cable; and whether the ports are marked, because discreet marking is what lets a guest charge without calling the desk. Fast charging is negotiated between the charger and the device, so the fixture's job is to offer a socket able to take part in that conversation rather than one supplying a fixed low current. The output the port is rated to deliver belongs on the lighting schedule.

Two guests, one supply: planning for simultaneous use

Overnight charging is a two-person event in most rooms: both bedsides get used at once, often with a phone and a watch on each side and occasionally a laptop.

What has to be settled is the behaviour when every port is in use. Two outcomes are acceptable and one is not. Acceptable: each port delivers a charge worth waiting for. Not acceptable: total output is divided so thinly that nothing is ready before the guest wakes. So state behaviour under full load, not only a port count.

Ports are counted by the guest, not by the specifier. Four sockets that all underperform read as one working port and three that do not.

Where the electronics live: depth, heat and access

A charging assembly takes up space, and the space behind a headboard is the most contested part of the wall. Joinery, a service void and the fixture's own fixing all want the same few centimetres.

Three constraints drive the layout. Depth: a wall built as board over furring has far less room than one over blockwork, and the driver plus the charging module have to fit in what is genuinely there. Heat: an assembly running overnight inside a closed backplate needs somewhere for that heat to go, which is a reason to keep the electronics out of the shade. Access: whoever services the socket will reach it from the room, or they will cut the wall.

  • Confirm the build-up and the available depth before the fixture is drawn.
  • Keep the charging assembly out of the shade and off the hot side of the driver.
  • Put the electronics on the serviceable side of the backplate, with a route to reach them.

None of this is exotic engineering. The cost of getting it wrong is, which is why depth and access belong in the specification rather than in the installation instructions.

What to check on the sample, not on the drawing

Charging behaviour is the part of a bedroom fixture least likely to appear on a drawing, so the sample in the room is where it shows up. Four entries also belong on the lighting schedule, because most charging failures found after handover were never wrong on site, only never written down: the ports at each position and the connector each one carries; the output each is rated to deliver and the total the position can supply; where the port sits on the backplate; and the supply the assembly draws from.

  • That the port is reachable from a seated position on the bed, with the shade fitted and a cable in place.
  • That the cable enters without straining the connector, and can stay plugged in while the light is used.
  • That the socket charges at the rate the specification promised, on a device the hotel actually uses.
  • That the backplate carrying the charging assembly still sits flush and still covers the wall box.
  • That the fixture does not become the warmest object in the room after an hour of charging.

A single-piece sample is the right instrument here for the same reason it works elsewhere: it tests the one detail that changed without committing the order to a run.

FAQ

Does integrated charging make a fixture harder to approve?

It adds an electrical element that has to be declared, so the approval route differs from a light-only fixture. Raise it at specification stage, not at sample stage.

Can charging be added to an existing bedside light?

Sometimes, if there is depth and a supply behind the backplate. Where there is not, a separate charging block beside the fixture is the honest answer.

Which connector should a hotel specify?

Both the current standard and the previous one, at least through the first procurement cycle. Offering only the newest connector dates the room the moment a guest arrives with an older cable.

Do the ports need to be marked?

Yes, discreetly. A port a guest cannot identify is a port they will not use, which is the most common reason a charging upgrade goes unnoticed.

How does charging affect the fixture's lead time?

It is an assembly detail rather than a structural change, so it normally sits inside the made-to-order window. What it changes is the sample stage, so settle it before the order is released.

The takeaway

Charging at the bedside is an electrical decision wearing an interior design costume. Decide integral or separate before the fixture is drawn, state what the ports must deliver under full load, check depth, heat and access while the wall is open, and prove the detail on a sample. Then the room works the way the guest uses it, not the way the render showed it.

Zerouno Lighting (ZeroUNO) manufactures hospitality decorative lighting in Zhongshan, China, and has supplied project and custom fixtures since 2013. A bespoke detail such as a moved socket or a restyled backplate is proved on a single sample piece before a run begins, with made-to-order lead times typically 25 to 35 days. Learn more at zerounolighting.com.

About the author

Sonny Yu is Sales Manager at Zerouno Lighting, working with designers and procurement teams on hotel lighting packages. Much of his week goes on the details that only surface once a fixture has to fit a wall that is already built.

2026年9月16日星期三

Reading Lights for Hotel Beds: Height, Angle and Glare

Of all the fittings in a hotel guest room, the bedside reading light is the one that fails most quietly. Nothing burns out, nothing falls off the wall, and the room still photographs correctly. It fails because the guest ends up tilting a book to find the beam, or because one person reading at eleven o'clock throws light across the whole bed.

This guide is for owners, designers, procurement teams and engineering staff who specify, order or sign off bedside lighting. It covers mounting height, beam angle, glare control, control placement and mechanism choice, and what to test in a mock-up room before the specification is frozen.

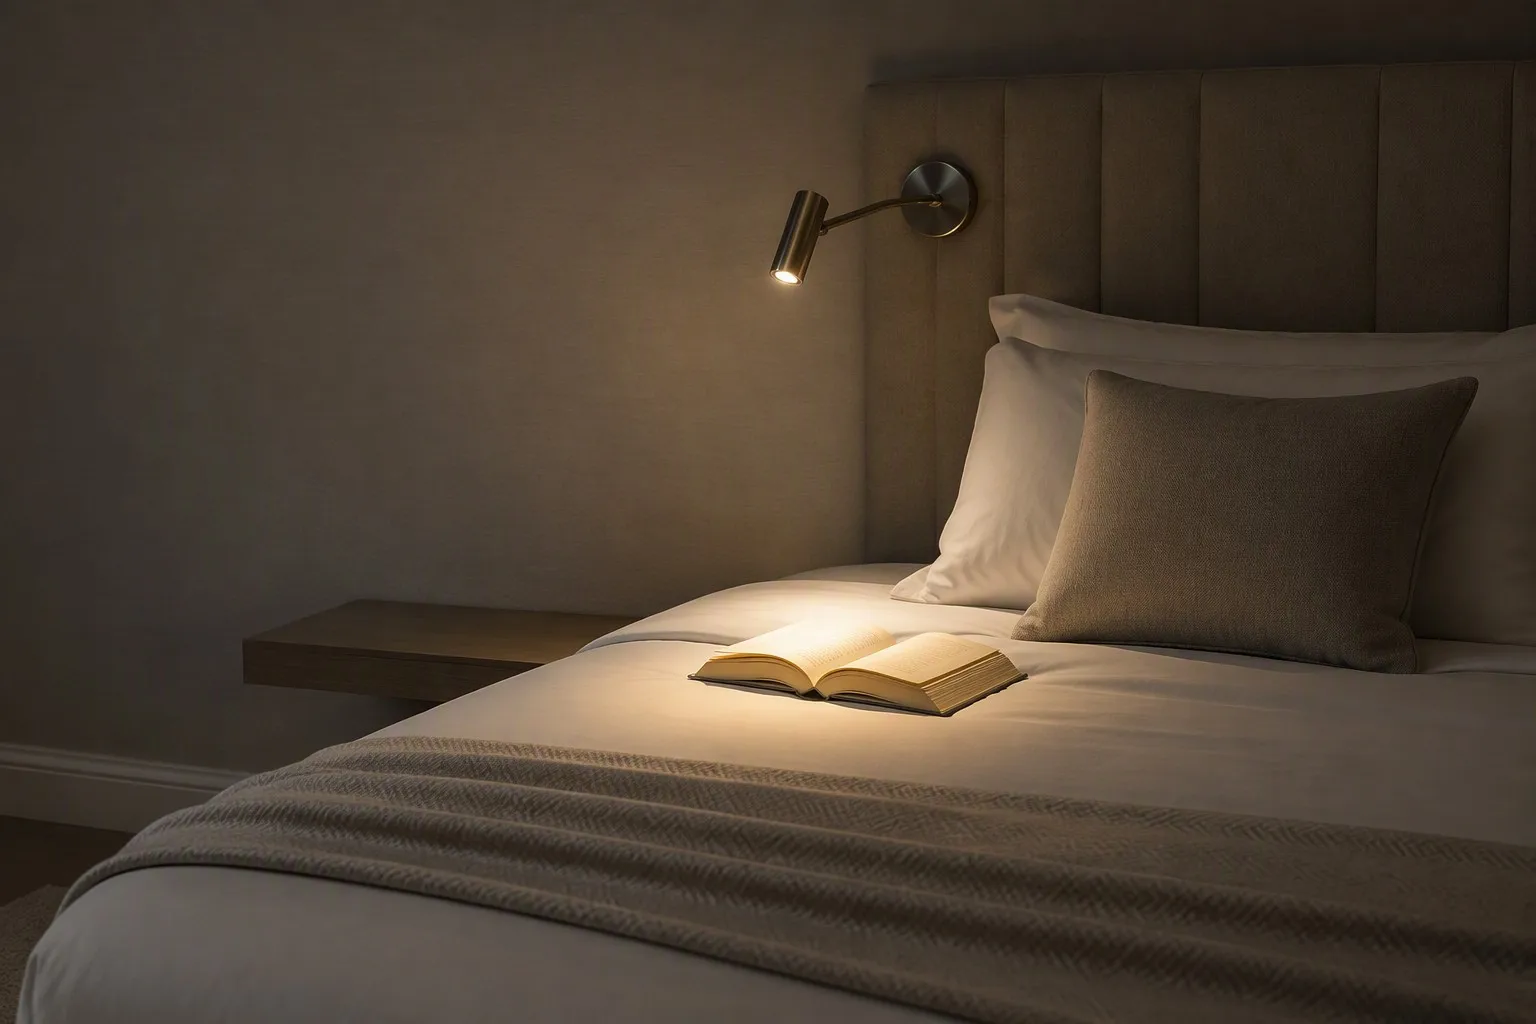
Wall-mounted hotel bedside reading light aimed down at an open book on the bed
A bedside reading light should put its beam on the page, not on the room.

A reading light is a geometry problem before it is a brightness problem

Reading in bed is a task with an awkward geometry. The reader is lying down, so the head sits low and close to the surface the light has to land on, the book is held at an angle that shifts as the reader moves, and there is usually a second person in the bed who did not ask for any light at all.

That combination means a fitting chosen on appearance alone will often disappoint. What matters is where the source sits relative to the reader's head, and how far the beam spreads from there. Brightness is a consequence of those two decisions, not a substitute for them.

A bedside fitting has to do five things at once:

  • Land useful light on the page rather than on the pillow or the reader's face.
  • Keep the source out of the reader's direct line of sight when the head is on the pillow.
  • Keep the beam off the neighbouring pillow.
  • Be reachable without the guest sitting up.
  • Dim low enough that the other occupant is not disturbed.

A fitting that satisfies all five is rarely the smallest one in the range.

Set the mounting height from the mattress, not the floor

The most common specification error is a mounting height taken from the floor. Mattress height varies between brands, and it changes again when a property replaces toppers or swaps a bed frame. A fixture set at what looked correct on a drawing can sit well below the reader's shoulder two years later.

Measure from the top of the mattress instead, and set the source above the mattress plane and forward of the pillow, near shoulder level when the guest is lying down. The project lighting designer validates the final dimension against the actual bed specification and the local standard.

Where the source sitsWhat the reader getsWhat goes wrong
Above the mattress, forward of the pillowThe beam lands on the pageAim drifts high and the book falls out of it
Level with the mattress topLight across the pillowThe pillow becomes the brightest surface
Behind the reader's shoulderGrazing light across the pageThe reader's own head casts a shadow
Two headboard fittings set wide apartCoverage for a double bedLight collects between the two readers
Ceiling or cove onlyEven general lightNo task layer at all

Beam angle: why a narrow optic usually beats a broader one

A beam angle describes how far a fitting's light spreads. A narrow optic concentrates output into a small pool; a wide optic spreads the same output over a larger area. For reading the target is small, because a paperback is not a large object.

  • A narrow optic puts usable light on the page with less spill towards the other occupant.
  • A wide optic lights the wall evenly and suits a decorative wall light, but rarely works as a task light.
  • A narrow beam aimed badly is worse than a wide beam aimed well.
  • Where one fitting must serve both roles, an asymmetric distribution is the usual compromise.
The test is not how the fitting looks switched on in a showroom. It is whether a guest lying on the pillow can read without moving the book, and without the other side of the bed noticing the light.

Glare: solve for two people, not one

Glare in a guest room is rarely about the fitting being too bright. It is about the source being visible. When the light source can be seen directly from either pillow, the fitting will be judged harsh regardless of its output.

  • Recess or shield the source so it cannot be seen from either pillow position.
  • Prefer a deep or baffled shade over an open one.
  • Check reflections in the mirror, the television screen and any polished surface at eye level. A reflection reads as glare even when the fixture is out of view.
  • Check the finish: a polished interior near the source returns a hot spot, a matte one does not.

This is where the second occupant enters the brief: the person not reading experiences the fitting as a problem, and their tolerance limits how much light can leave the page.

Controls: reachable lying down, and able to go low

A reading light that has to be switched off by getting up will be reported. The switch should be reachable from the lying position.

  • Provide local dimming, not only local switching.
  • Keep the reading circuit separate from the general room circuit, so turning the room off does not force the bedside light off with it.
  • Avoid a single master switch at the entrance that silently cuts the bedside supply.
  • In controlled rooms, confirm the reading light is separately addressable rather than a group member that moves with the scene.

Mechanism: match the fitting to how guests will use it

The mechanism decides whether the fitting still works after five years of adjustment. Four families cover most hotel rooms.

MechanismBest forWhat to watch
Fixed directional headStandard rooms with a known bed positionNo adjustment, so the initial aim must be recorded
Swing armRooms where guests move the light to suit themselvesJoints that loosen; specify a friction joint, not a detent
Flexible gooseneckShallow headboards and close reading positionsRe-aiming fatigue; keep the driver in the base, not the head
Headboard integratedClean lines and a fixed bed layoutReflector geometry drives glare; test with the mattress in place

On any adjustable fitting, the moving part is also the part that wears. Ask what the joint is made of, and hold spare units so a replacement matches.

What to test in the mock-up room

A mock-up room is the only place where mounting height, aim, mattress height and the actual headboard can be judged together. Four checks cover most of the risk.

  • Lie on the bed with the real mattress and topper fitted, and read at each bedside.
  • Check the fitting from the opposite pillow with everything else switched off.
  • Check the lowest dimming level in a dark room and judge whether it still disturbs the other occupant.
  • Photograph the aim and record the exact mounting dimension.

Write those dimensions onto the fixture schedule. A mounting height agreed in the room and never written down leaves every later floor to be aimed by eye.

FAQ

How high should a hotel bedside reading light be mounted?

Measure from the top of the mattress rather than the floor, and set the source above the mattress plane and forward of the pillow, near shoulder level when lying down. The project lighting designer sets the final dimension.

What beam angle works best for bedside reading?

A narrow optic aimed carefully is usually more comfortable than a wide one, because it puts light on the page and less on the neighbouring pillow. Aim matters more than angle.

Should the reading light be on its own circuit?

Yes. A separate dimmable circuit lets one guest keep reading while the rest of the room goes dark, and stops a master switch by the door from cutting the bedside light.

Are integrated USB ports at the bedside worth adding?

They are commonly requested and rarely regretted, but they change the electrical layout. Confirm the port rating, where the transformer sits, and whether the port stays live when the light is off.

Can existing bedside lights be upgraded to read better?

Often yes, without new wiring. Re-aiming the fitting, swapping a wide optic for a narrow one or an open shade for a baffled one, and confirming local dimming will solve a large share of complaints.

The takeaway

A bedside reading light is judged on geometry, not output. Set the mounting height from the mattress top, choose a narrow optic, and aim it at the page rather than the room. Shield the source, give the guest local dimming on a separate circuit, and match the mechanism to how the fitting will be moved. Then test the arrangement in a mock-up room with the real mattress in place, and write the final dimensions onto the fixture schedule.

Zerouno Lighting (ZeroUNO) manufactures hospitality decorative lighting in Zhongshan, China, founded in 2013 with a team of 120. The company produces bedside and headboard integrated reading lights to project specifications, and supplies single piece samples for mock-up sign-off. Learn more at zerounolighting.com.

About the author

Sonny Yu is Sales Manager at Zerouno Lighting, working with hotel owners, interior designers and procurement teams on decorative lighting packages for hospitality projects. He writes about the practical side of specifying hotel lighting, from bedside reading comfort through to finish continuity, lead times and after-sales terms.

2026年9月12日星期六

Guest Room Lighting Complaints: A Diagnostic Checklist

Every hotel carries a short list of lighting complaints that no snagging process ever caught. The bedside light that only responds if you press the switch twice. The mirror light that makes guests look tired in photographs. The reading lamp that hums whenever the dimmer sits in one particular position. None of these surface at pre-opening inspection, because the room is empty.

This guide is for the people who receive those reports: facility and engineering teams, duty managers, and the procurement staff who end up chasing the original lighting supplier. The goal is to separate faults you can fix in the room from problems that are really specification decisions, and to capture evidence that makes the second visit cheaper than the first.

Wall-mounted hotel bedside reading lamp above a timber nightstand, with a dimmer plate beside the headboard
The complaint usually starts at the spot in the frame: a bedside lamp, a nightstand, and a dimmer plate the guest has to find in the dark.

Complaint language tells you which fault family you are dealing with

Guests do not report dimming incompatibility or driver failure. They report outcomes, and the wording is a useful first filter. It is too dark in here is rarely a dead lamp. It flickers when I turn it down almost always points at the control side. It buzzes is a compatibility symptom. I could not find the switch is a layout problem, not an electrical one.

A complaint phrased as a preference, such as too dim or not enough light at the mirror, usually survives a repair visit untouched. A complaint phrased as a defect, such as dead, flickering, buzzing or loose, usually does not.

The four fault families behind most guest room lighting complaints

Almost every report traces back to one of four families. Sorting the report into the right family is most of the diagnostic work; the repair itself is usually the easy part.

  • Design-level. The fixture works as specified and the guest still dislikes it: one central ceiling light in a room that needed layers, a mirror light mounted directly overhead, or a switch panel nobody can read in the dark.
  • Control and programming. The hardware is fine but the behaviour confuses: scenes that do not match their labels, a master switch that kills the reading light, or key-card logic that resets to an uncomfortable default.
  • Electrical and dimming compatibility. Flicker, buzz, a drop-out at the low end, or a faint glow with the circuit off. These are normally mismatches between dimmer, driver and circuit load rather than a failed component.
  • Hardware wear and installation. A wedged shade, a loose backplate, a cracked diffuser, an over-tightened lamp, or a connector never fully seated.

A triage table for the five most common reports

Use the table as a first-pass router. It does not replace an electrical inspection, but it prevents the most common misrouting: sending a maintenance ticket to a problem that only a specification change will solve.

What the guest reports Most likely family First check in the room Who should own it
Too dim or too bright Design-level Confirm the fixture reaches its intended output and no scene caps it Design team, with engineering evidence
Flickers when dimmed Electrical and dimming Reproduce it, record the dimmer position, test the circuit load Engineering, then the supplier
Lamp buzzes Electrical and dimming Note whether noise comes from fixture, driver or wall dimmer Engineering, then the supplier
Cannot work the switches Control and programming Walk the room at night and try every panel in darkness Engineering and the programmer
Mirror light is unflattering Design-level Photograph a person at the mirror from the guest's position Design team, logged for refurbishment

Running a fifteen-minute in-room triage

The goal is not to fix the report immediately but to identify its family with enough confidence that the right person is sent. This sequence fits inside a normal shift.

  1. Reproduce it in the guest's position. Sit on the bed, stand at the mirror, and walk in from the corridor with the lights off. Complaints often turn into a different complaint once the room is used the way it is actually used.
  2. Test every control state, not just on. Full brightness, minimum brightness, each scene, master off, and key card reinserted. Note which states misbehave.
  3. Isolate the layer. Where several lights share a circuit, switch each on alone to see whether the fault follows the fixture or the circuit.
  4. Check the electrical signatures. Buzz, flicker, low-end drop-out and faint glow with the circuit off all point at the dimmer and driver pairing rather than a dead LED.
  5. Inspect the physical install. Backplate tightness, shade alignment, diffuser seating and connector depth.
  6. Name an owner before closing the ticket. A ticket that ends with monitor will be reopened; one that ends with a named owner and a next action usually will not.
Rule of thumb: if the same complaint arrives from two different guests in the same room type within a month, stop treating it as a maintenance ticket and treat it as a specification note. Maintenance fixes one room. Specification fixes the next hundred.

When the problem is specification, not repair

Some complaints return however many times the fixture is replaced, because the fixture was never the problem. Two signals identify that case. The first is consistency across a room type: the same report from several rooms with the same layout and fixture schedule. The second is phrasing: when guests describe a preference rather than a defect, they are telling you the room performs as designed and the design is what they dislike.

The honest response is to stop repairing and start logging. Record design-level reports against the room type, with the date and the guest's wording, and hand the record to the project team before the next refurbishment window is scoped. A refurbishment can absorb a switch reposition, an extra lighting layer or a different fixture family. A maintenance budget cannot.

What to capture before you contact the lighting supplier

A supplier who receives a usable report can usually answer in one exchange. A supplier who receives the light is broken cannot answer at all. Collect the following before raising the request.

  • Room number and room type, plus how many rooms share the report.
  • Fixture reference, any batch or delivery marking, and installation date.
  • A photograph of the fixture in place and one of its label or driver marking.
  • A short video with sound if the fault is flicker or buzz, which written descriptions rarely capture well.
  • The dimmer position, scene and control state in which the fault appears.
  • What has already been swapped or tested, and what changed as a result.

Reducing the next wave of complaints

Most of the cost here is not the repair, it is the repetition.

  • Label controls in the guest's language, not the programmer's. Reading is usable at two in the morning; a circuit number is not.
  • Keep a small critical spares set per room type: diffusers, shades, drivers and connectors for the fixture families that dominate the property.
  • Keep a one-page dimmer compatibility record, so a replacement driver is never chosen by whatever is in the van that day.

FAQ

The guest says the room is too dark. Is that a fault?

Usually not. A room can be fully functional and still read as dark to a guest arriving from a bright corridor. Confirm that every fixture reaches its intended output and that no scene is capping the level, then file the report as a design note. It becomes a maintenance issue only if a fixture measures below its siblings in the same room type.

Why does an LED fixture flicker only at certain dimmer positions?

Flicker across part of the dimming range is a compatibility symptom rather than a failure. The dimmer, the driver and the circuit load are not working well together, and it often appears only on lightly loaded circuits. Reproducing it at the exact dimmer position is far more useful to a supplier than a general report of flicker.

How quickly should a lighting fault be resolved?

That depends on the fault. A room that cannot be lit safely should be dealt with the same day, even if only by moving the guest or providing a temporary lamp. A flicker or buzz that does not affect safety can follow a normal maintenance cycle, provided the room is not sold as fault-free.

Is a buzzing bedside lamp dangerous?

Buzz is normally an annoyance rather than a hazard, and it usually originates at the dimmer or the driver rather than the LED itself. It should still be logged, because the same mismatch that produces noise can shorten component life. If it comes with heat or a burning smell, treat it as an electrical fault.

The takeaway

Guest room lighting complaints are rarely mysteries once they are sorted into the right family. The ones that keep coming back are almost never repaired badly; they were never maintenance problems to begin with. Separate the fault from the preference, reproduce the report the way the guest experienced it, and log the design-level issues while they are fresh.

Zerouno Lighting (ZeroUNO) manufactures hospitality decorative lighting in Zhongshan, China, working with hotel owners, interior designers and procurement teams on guest room, corridor and public area fixtures. Sampling starts from a single piece, and made-to-order programmes are backed by a two-year warranty with a 48-hour response commitment. Learn more at zerounolighting.com.

About the author

Sonny Yu is Sales Manager at Zerouno Lighting, where he works with hotel owners, interior designers and contractors on decorative lighting packages for new builds and refurbishments. He writes about the practical side of hospitality lighting: how fixtures are specified, how they are made, and what happens to them once the hotel is open.

Modular Chandelier Assembly: Site-Proof Part Numbering

A modular chandelier rarely fails on site because the fixture is wrong. It fails because the crate, the drawing and the ceiling stop agreein...